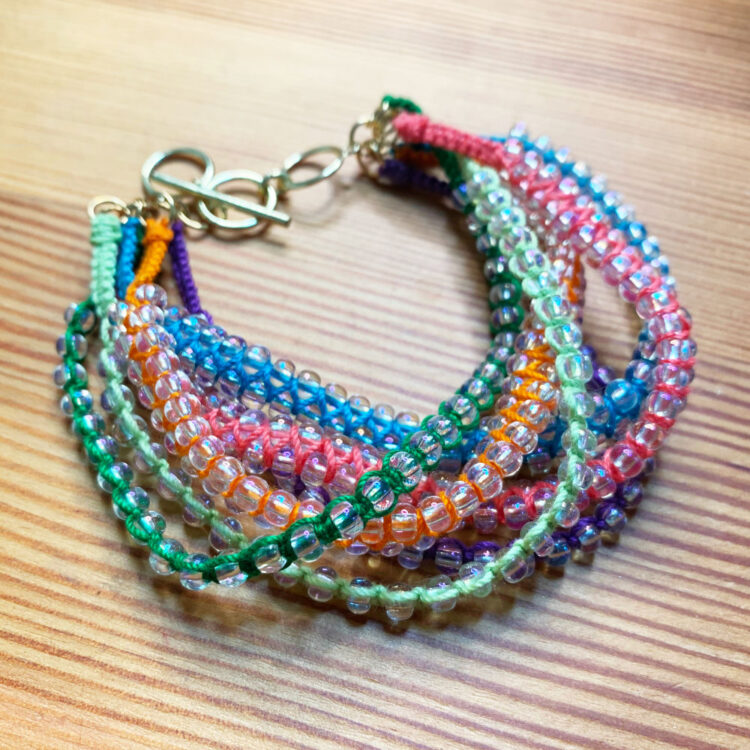
Something about summer makes me want to stack colorful bracelets up my arm, like this multi-strand bracelet with iridescent beads. It’s shiny and made in sunshine colors, and ready for a summer festival. The real motivation for this project was finding a bunch of bright new crochet thread colors. The methods are simple – the only knot you really need to know (or learn) is a square knot.

- #10 crochet thread in 2 colors
- sewing pins
- cork panels
- jewelry pliers
- sharp scissors
- jump rings
- fray check or clear fabric glue
- bracelet clasp
- 6/0 seed beads
Setup
 Cut two strands of crochet thread, each 48 inches long. Use a lark’s head knot to tie them to a jump ring. Make the strands at the center 12 inches long, so the outer strands are 36 inches long. Seal the tips of the short strands with fray check or white glue so it’s easy to thread beads onto them.

Tie a square knot, this is the first half…

And this is the second half. Doing it this way ensures the knots won’t twist.
Version 1

You’ll need a short length of plain square knots to make it easier to use the clasp. I made 10 square knots, it’s about an inch of knots.

Thread a bunch of seed beads onto the center strands. I used about 30 per strand, you can always remove any extras.

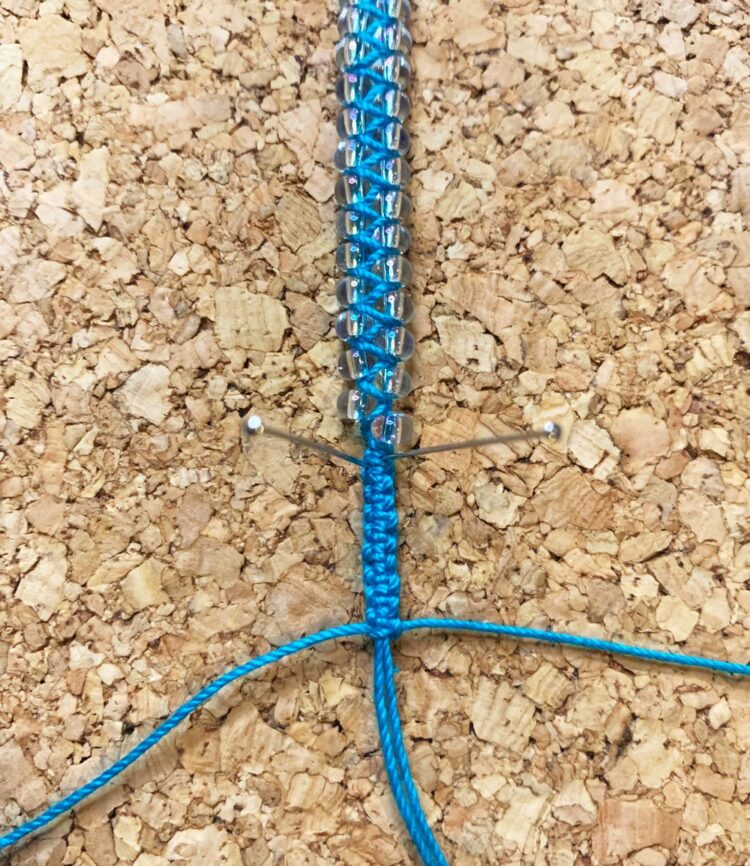
Start by wrapping the right side strand around the two beaded center strands.

Each wrap needs to pop in between the strung beads. It may make it easier if you temporarily tie the beaded strands together and pin them out with some tension on them.

Continue wrapping those strands, popping the crochet thread in between each pair of beads as shown here.

Wrap until you get to a good length, which should be about an inch less than the total desired length.

When the right strand is wrapped all the way down, the left side needs to wrap.

Wrap this way in a similar manner, again popping it in between the seed beads.

It will form little matching angles. Be careful with your tension, it is easy to leave little bobbles of thread on the back.

Again, wrap this strand all the way down.


It should look something like this when you get to the end.

Now it’s time to switch back to square knots. Check the tension and looks for thread loops one more time before you begin knotting.
Finish the Strand

Switch back to square knots, and do the same number as at the beginning – 10 knots for me.

Then turn your strand around and put the center strands through a jump ring.
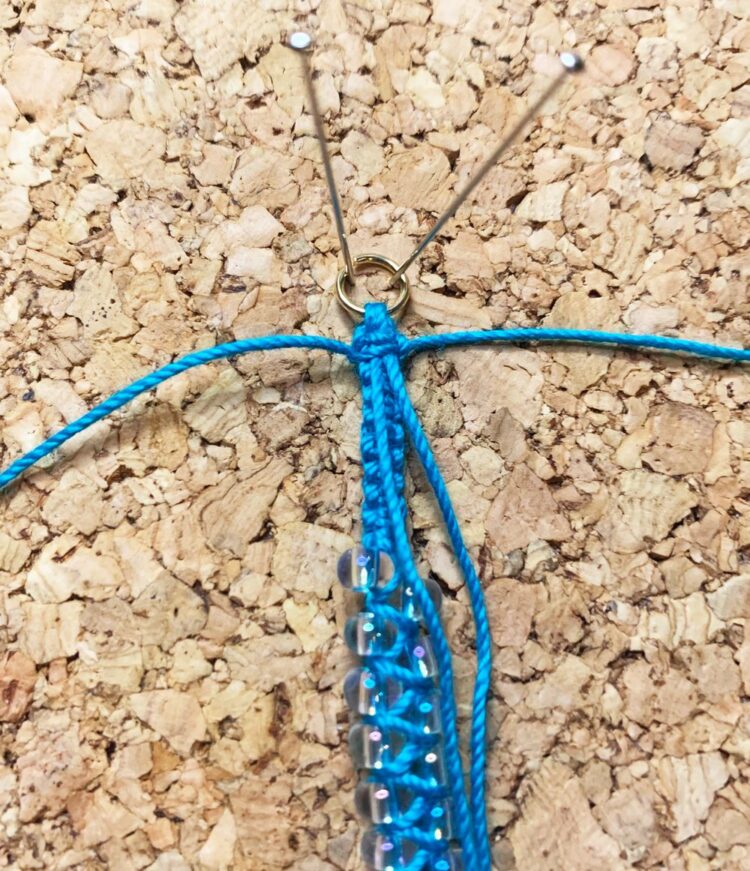
Once again square knot, but this time around the whole thing.

It only takes a couple knots to secure it, I made 2 full square knots.

Use a blunt needle to run the side strands through the knot.

Make as many pieces in this style as you’d like. I did a mix of this and the next style.
Version 2

Follow the setup instructions shown above.

String a bunch of beads onto the two center strands together.

Slide one bead up, and square knot below it.

Tighten the second half slowly so you can tweak the tension if necessary.

Repeat that until you get to your desired length.

Assembly
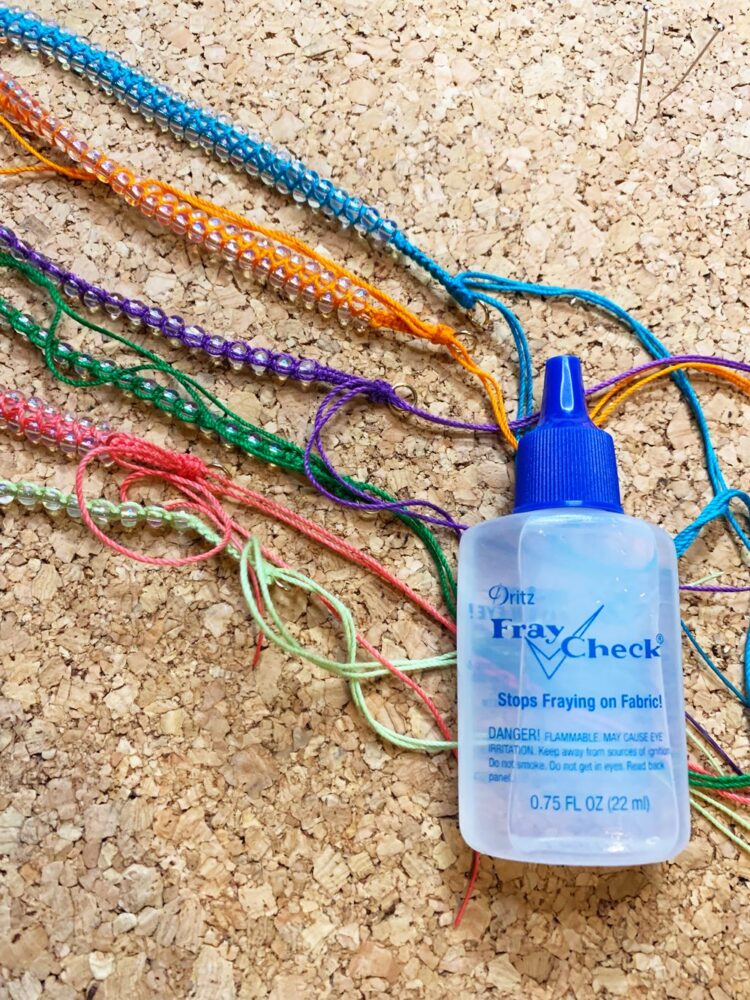
When all of your strands are knotted, fray check that ending knot and let it dry completely, then trim the tails.

I alternated the ends of the strands so the extra knots weren’t all on the same side.

Add one side of the clasp to one end of the strands.
 Then add the other side of the clasp to the other end of the strand, making sure they’re not so tangled that it makes them hang strangely.
And that’s it! All that’s left is to put it on and go find some sunshine!