I’m still on my dramatic earring kick, and these macrame tassel earrings certainly fit the bill. You could definitely make them a little more wearable by cutting the tassel strands shorter, or go all out like I did, and leave them shoulder-brushing length. Then they’re the perfect way to make a statement with a simple dress and a swept up or short hairstyle.


Start by cutting some strands – 6 dark pink and 4 light pink, each 18 inches/46cm long – for each earring.

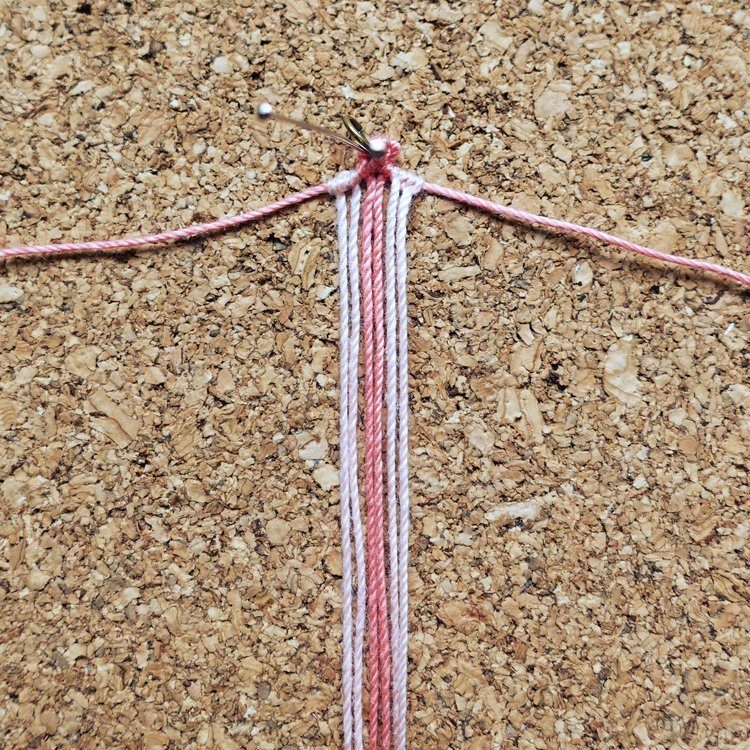
Start with two of the dark pink strands. This is the structure of the knot we’ll use to add all strands to the piece.

Start by making a lark’s head knot as shown, and tighten it with the ends of the strand even. Then slide it to the center of the strand you’re tying around.

Then add a half hitch on each side of the lark’s head knot.

Double check that this knot is centered on the strand it’s tied around.

Add a jump ring through the center of what’s going on as shown.

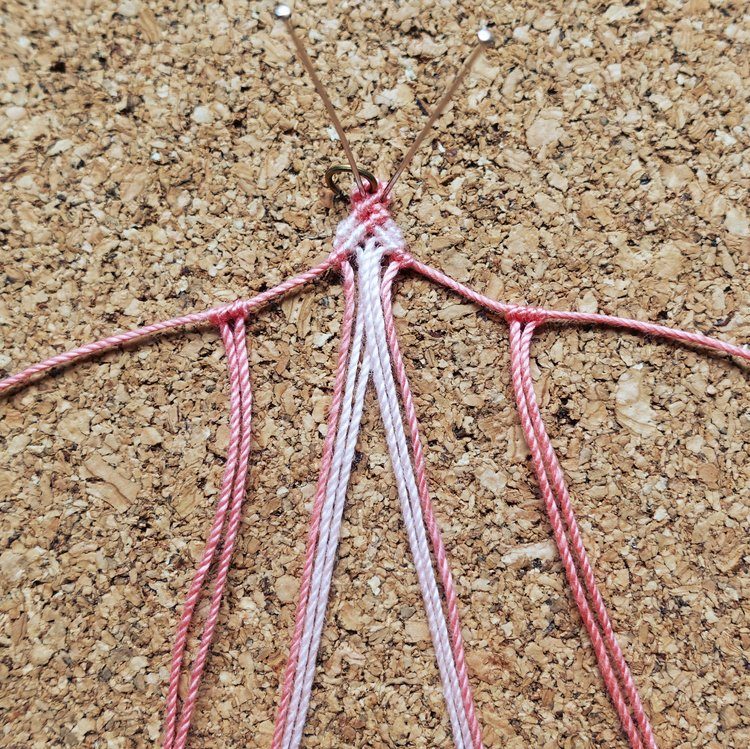
Take the right center strand across the left center strand. Tie a double half hitch with the left center strand. (If you’re new to double half hitch, tie and tighten one half hitch, then the second half hitch.)

Around the same strand, tie another double half hitch with the other strand on the left.

Then, with the strand on the right, tie a double half hitch around the third strand from the left. Use the picture, that’s easier.

Now add a light pink strand on each side.
Slide them up to the knots already tied at the center.

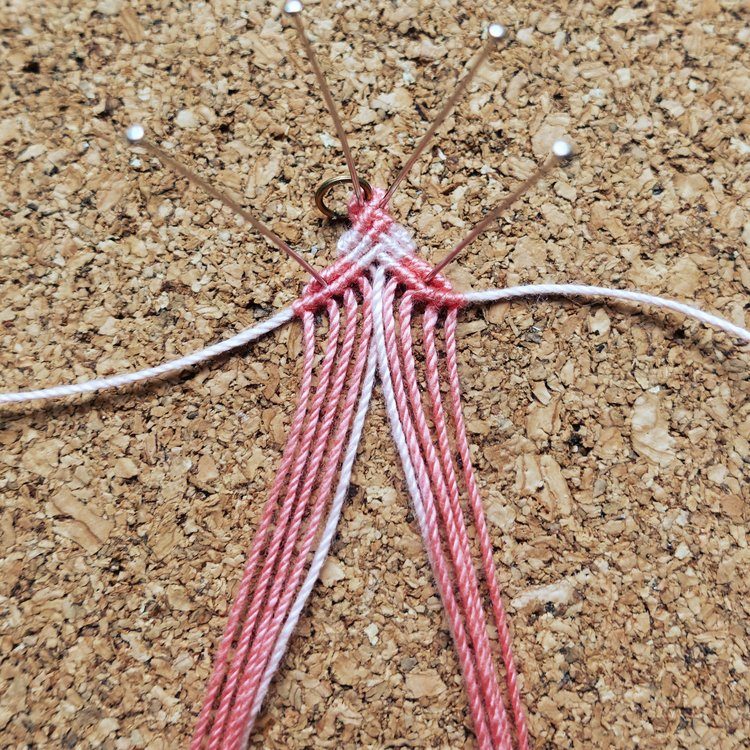
Split the group in half at the center. Left and right sides will be important for the rest of the project.

Bring the center right strand across the left, and tie a double half hitch over it with each strand on the left.

It should look like this when you’re done.

Then bring the center left strand across the strands on the right, and tie a double half hitch with each strand on the right.

It should look like this.
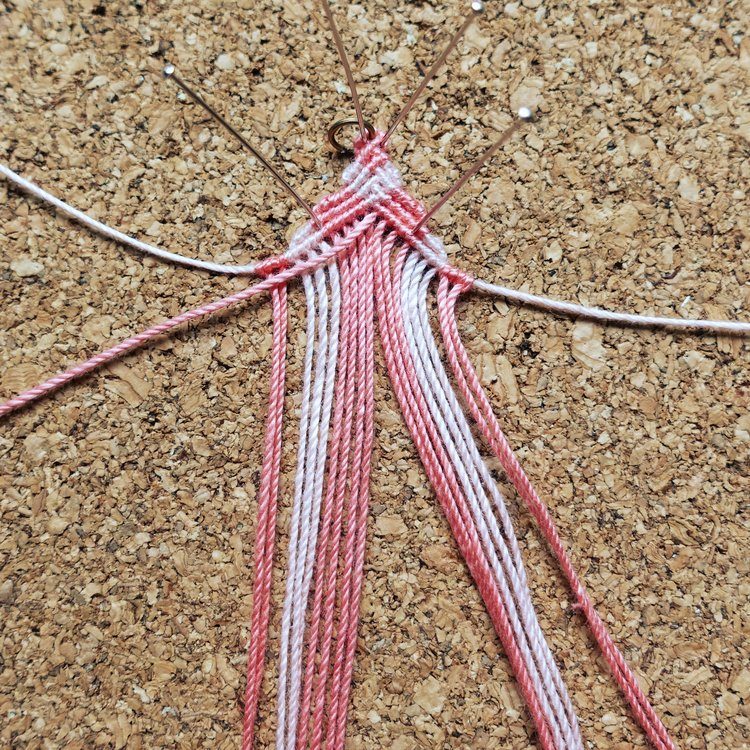
Add a dark pink strand on each side.

And repeat the previous steps – center right strand across the left…

… and center left strand across the right.

Add a light pink on each side and repeat again.


Then a dark pink on each side. These are the last strands to add.
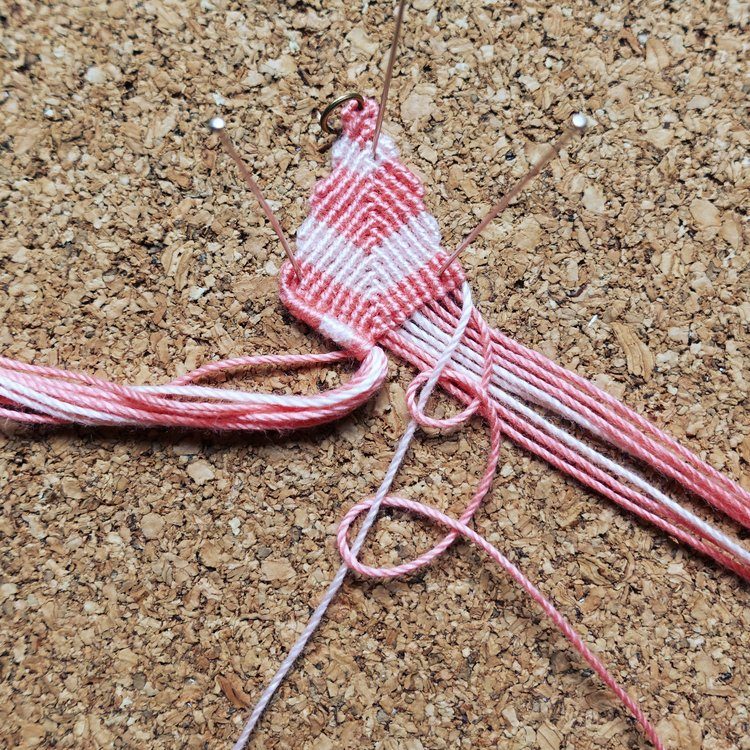
Bring the center right strand across the left, except for the farthest strand on the left. Just get that out of the way and don’t tie around it.

Do the same thing on the right side, again exempting the far right strand.

Then carry on, alternating sides, but not including the outermost strands.

Keep working back and forth that way until you run out of center strands.

It should look like this.

Now that far left strand can get involved again. Bring it across the left side. Tie a double half hitch around it with the strand next to it. Having a pin near that corner will help the piece tie up neatly.

Now this part is unusual. Bring the string you just used for tying over to the right with the one you just tied around. Using the next strand over, tie around both of those strands.

Bring the strand that just tied to the right, and now tie around all 3 strands.

The idea here is that you keep working strand by strand and collect up all of the strands into one big bundle.

And when you get to the end it will look like this. The last strand to tie with on the left is the only one not in the bundle. We’ll deal with it later.
And then do the same thing on the right. Bring the farthest right strand across, then tie around it with the next strand.

Let it join the first strand, and tie around 2 strands with the next one over.

Then tie around 3, and so forth.

At the end you’ll have this tidy finished edge with two wayward strands.

Cut another piece of the light pink. It should be the length of the remaining strands, plus about 3 inches/8cm. Match one end with the ends of the strands, and fold it over as shown.

Hold the loop at the back of the macrame, wrap the short end around all the rest of the strands 4 times, then put the tail through the loop.

Pull on the other end of the strand to eliminate the loop and tuck the cross over into the wrap. If you’re new to this kind of tassel wrap, check out Perfect Tassels Every Time for a more detailed explanation. Add a dot of fray check or glue here, and let dry before trimming the short end.


Make the other earring, then trim the long strands to all be the same length. I left mine long for extra drama, but you can cut yours to any length you’d like. After that just hook the jump ring onto the earhook and they’re ready to wear!

