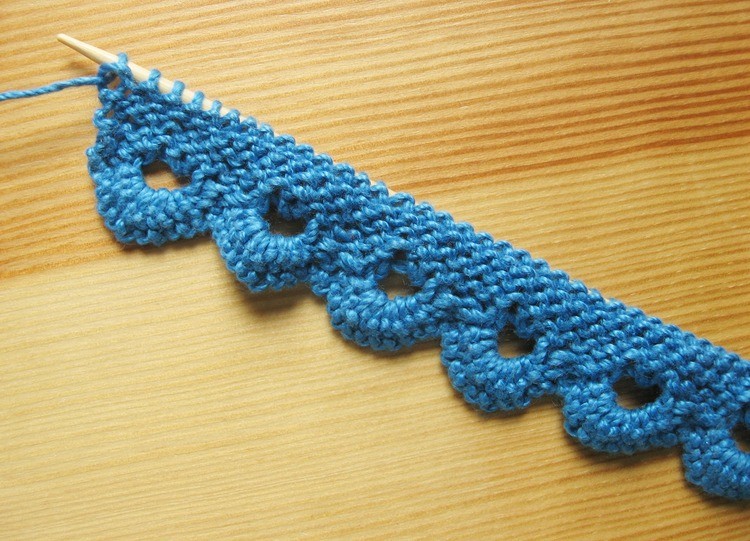
It’s amazing what you can do with two pattern rows when you’re knitting. This scalloped knitting edge is exactly what I’m talking about – the perfect way to add a special touch to the edge of a knitting project. It’s no where near as complicated as it looks, either!

Scalloped Edge Stitch
Cast on a Multiple of 11 + 2, when you’re finished you’ll have a Multiple of 6 + 2
1) purl
2) k2, * k1, slip it back to left hand needle, pass next 8 stitches over it and off the needle, yo 2 times, knit the slipped stitch again, k2*
3) k1, *p2tog, slip 1 yo off, (k1 in front of loop, k1 in back of loop) 2 times in yo loop, p1* k1
4) knit
k = knit
p = purl
yo = yarn over
p2tog = purl two stitches together
Technique Photo Tutorial:
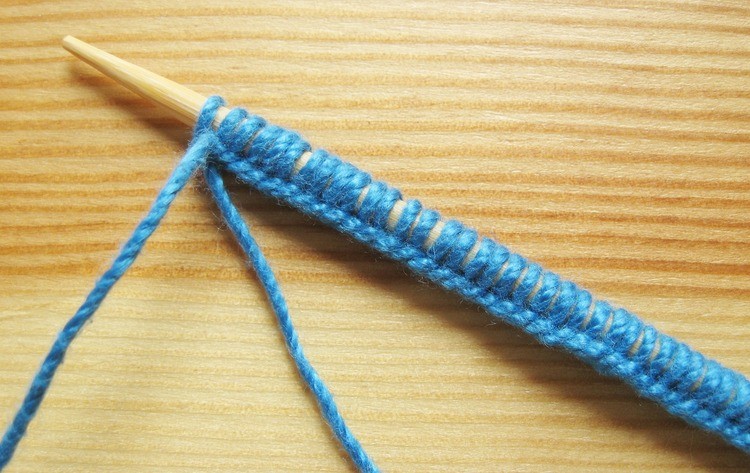
Cast on your stitches (a multiple of 11 + 2). I used a 1 needle cast on. Purl 1 row.

Knit the first 2 stitches for selvedge, then knit 1.

Slip the last stitch you knit back to the left needle.

Lift the next 8 stitches over the stitch you just moved.

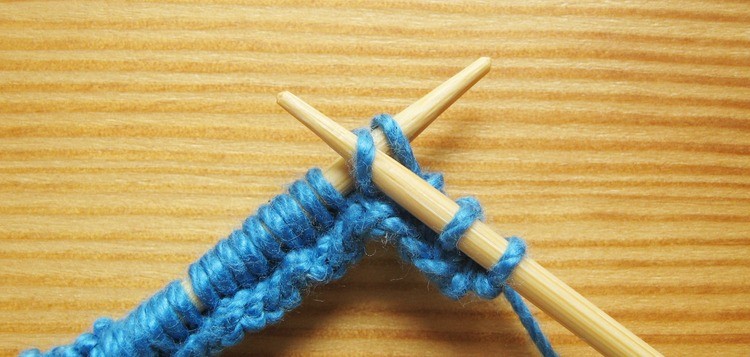


It will look like this. I had the best looking scallops when I pulled up the yarn tightly on the stitch the other 8 were all looped over.

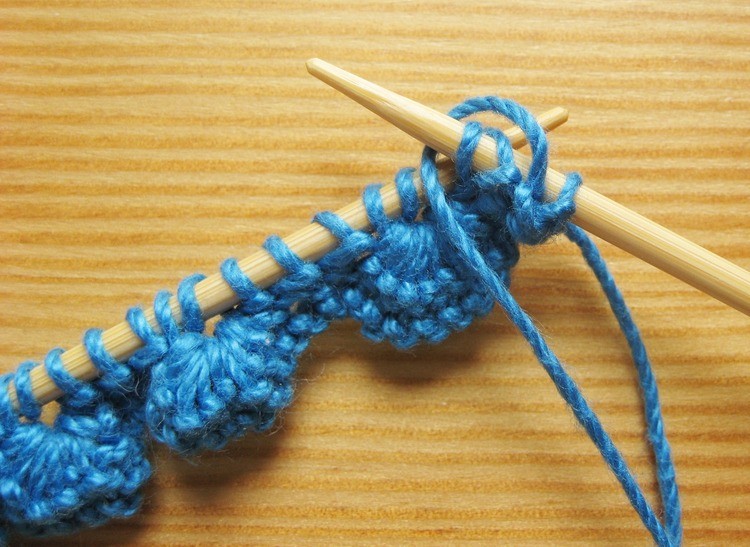
Yarn over twice.

Knit 2 to finish the repeat, then knit 1 to start the next repeat.

Slip it to the left needle and continue the repeat until the end of the row.

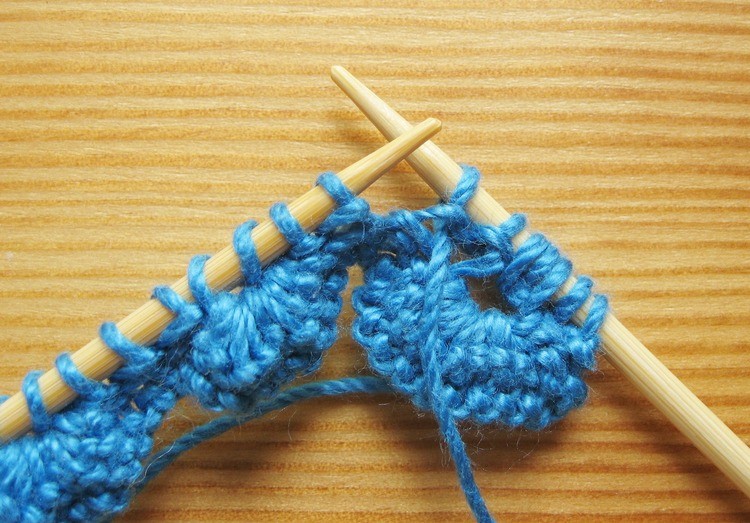
Turn it around and knit 1, then purl 2 together. If you’ve never done that before it’s exactly what it sounds like. Work it like any other purl stitch, but with 2 stitches together instead of 1.


Drop one of the yarn overs off the needle.

Now turn the big loop around. Pass it to the right by placing the right needle into the back of the loop as shown.


Then pass it back to the left.

Knit the stitch like usual, but don’t pull it off the left needle.

Knit into the back of the loop and pull it off the needle.


Pick the loop back up with the left needle as shown. Knit into the front and back of the stitch again.

I know all that turning, dropping, and picking up seemed a bit silly, but I swatched more efficient methods and none of them looked as nice as this.
Purl 1 stitch and then start the repeat over with the purl 2 together. At the end of the row you’ll knit 1 selvedge stitch.

I’ve added a few rows of stockinette here to show the finished effect. If you wanted your scallops tighter you could use 1 yarn over instead of 2, but it’s probably important to test that to be sure it won’t pull on whatever you knit above it.
I think the ‘back’ side of these scallops are just as pretty as the ‘front’!