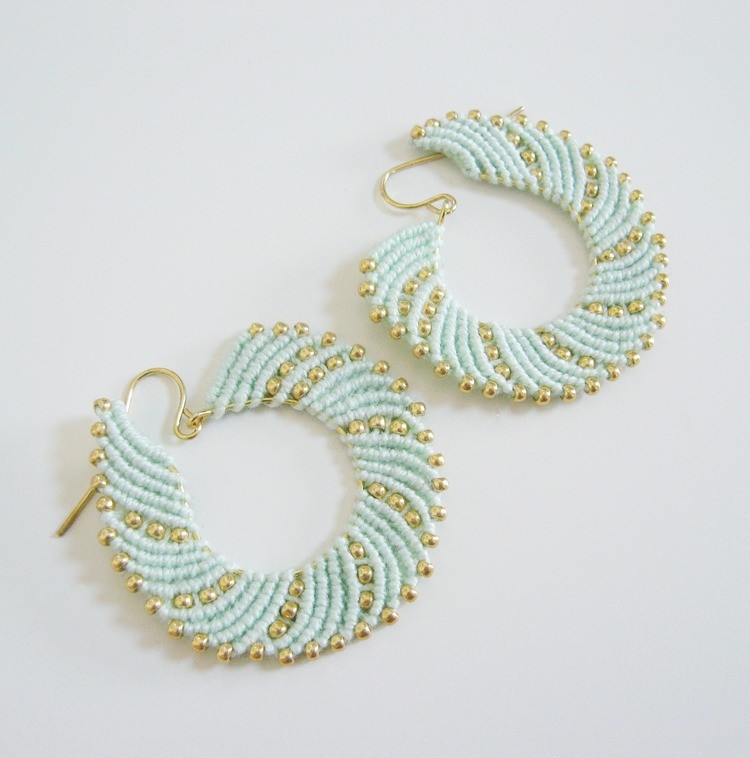
These macrame earrings are one of those projects where a fun technique and some pretty geometry came together to be really addictive. Adding beads to rows of double half hitch knots automatically creates the swirl effect, and the knotting is sturdy enough to hold its shape without needing any additional structure beyond the wire loop at the center.

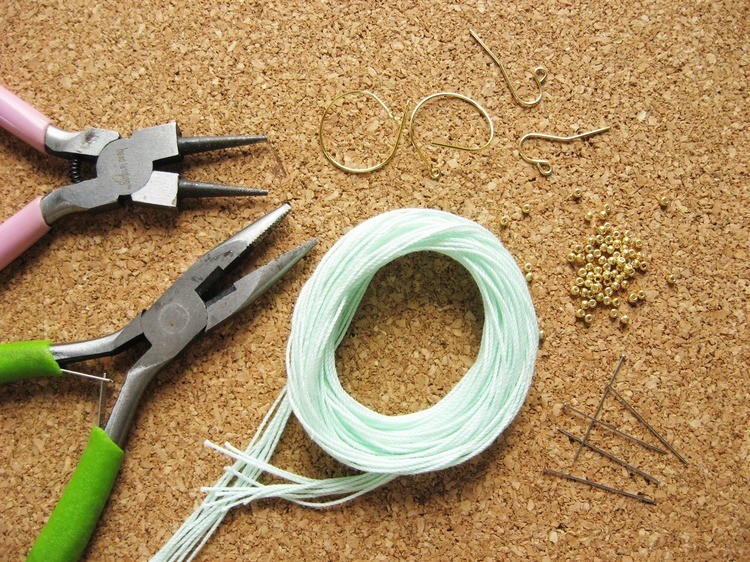
Supplies:
– #10 crochet cotton
– 11° seed beads
– round earring loops (these are about 3/4 inch | 2 cm across)
– ear wires
– round nose pliers
– needle nose pliers
– E6000, fray check, or other clear, fabric friendly glue or sealer
– white glue
– scissors
– pins
– cork panels or something else you can pin to
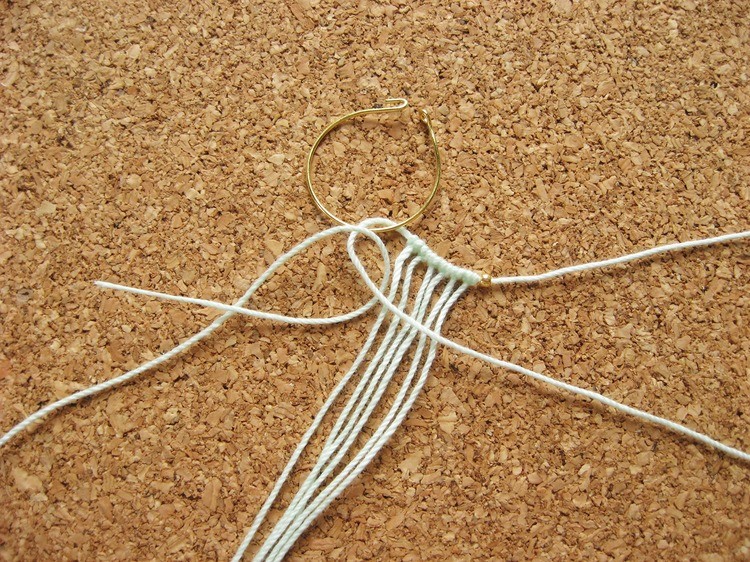
Cut 8 total strands (4 for each earring) of the crochet cotton. Cutting them 48 inches | 122cm long will ensure you have plenty of length for this size loop. Cutting them 1 yard | 1 meter long was just barely enough. Use the white glue on the ends to stiffen them up so it’s easy to slide beads onto the strands.
This version is made in mint and gold for a sunny weather look, but crochet cotton and seed beads are available in endless variety so you could adjust this to any look. Crochet cotton dyes well, so you could even create a completely custom color. Changing the size of the seed beads used changes the amount of swirl. Using a different number of strands or a different center loop size would also create a different effect.
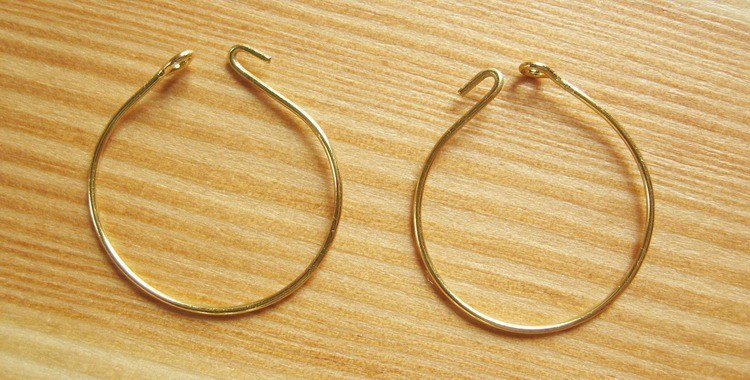
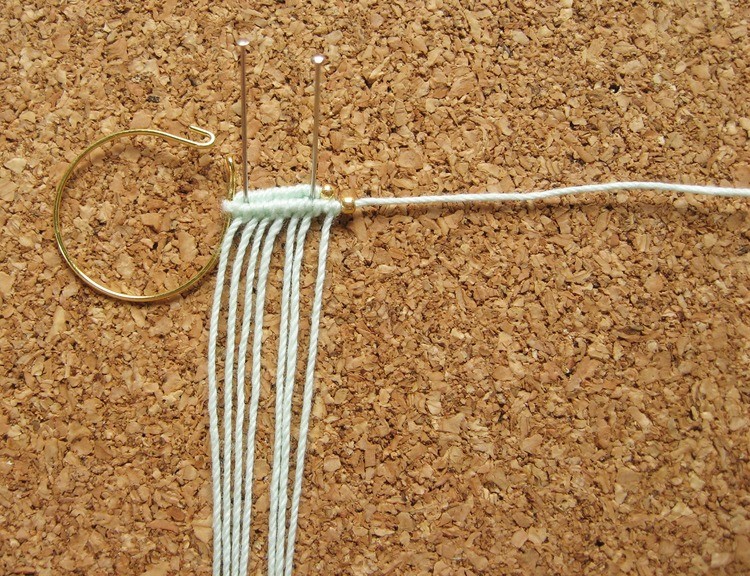
Use the round nose pliers to bend a little hook at the ends of the wire loops. This will prevent all your knotting efforts from sliding off the end.

Use one strand to make a lark’s head knot over another strand.

Pull it to the center of the strand it’s knotted over.

Add a half hitch knot on either side to create the effect of this being two double half hitches on another strand.

It should look like this. Do the same thing with two other strands, one on each side of this knot.

Double check that it’s still at the center of the strand you were knotting over.

Slide a bead onto the strand at the end.

Send the strand at the other end through the wire earring loop. Make sure you’re working at the loop end, not the hook end, of the wire.
Lay that end strand (the one hooked through the wire loop) across the other strands and make a double half hitch knot with each of those strands.


When you get to the last strand, make sure the bead stays above the knot. It will push the rows apart slightly, this is totally okay.

First row done.
Now you can pin your work down and it’s a whole lot easier. (You can pin into the starter row before this, but it really misshaped my starter knots when I tried it.)
Slide what you’ve done up to the loop on the wire. String a bead onto the last strand.

Pull the strand closest to the wire loop through the loop from back to front.

Lay it across the other strands and make a row of double half hitches over it.

Make sure that bead stays above that strand’s double half hitch.
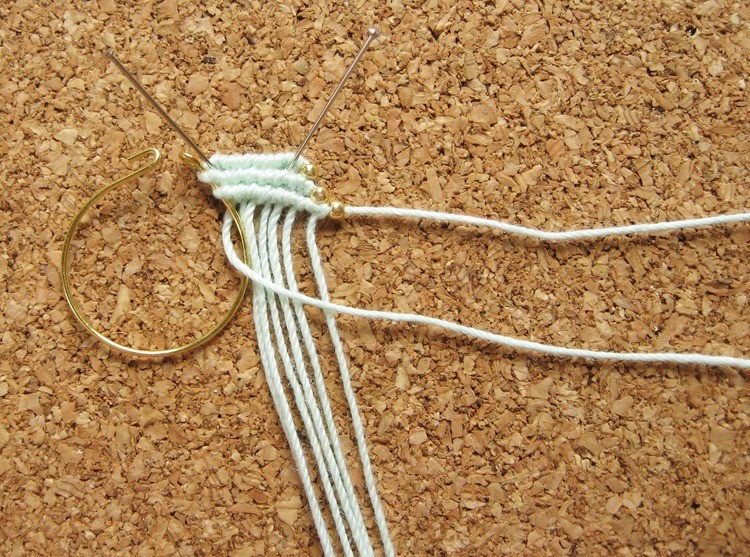
Do it all again.

For maximum symmetry, set up the other earring and work it to the same point, but swap what side the wire loop and added beads are on.

To add bead rows slide a bead onto the last strand, and every other strand (but definitely not the strand next to the wire loop.) There isn’t room to add a bead to every strand.

Bring that end strand through the wire loop, and knot as usual, making sure all of those beads are about their respective knots. Be careful with your tension, the strands without beads might pull things out of alignment slightly.


At this point I added a second row of beads. After that I added a single row of beads with 4 rows of knots between. You can add them in whatever pattern you like, and working both earrings at the same time makes it easy to be spontaneous with the pattern if you’d like.

When you get close to the end you’ll need to work around the hook. Use the pliers to bend it so that the hook so that it will be behind the macrame.

Make sure you continue to wrap your strand around the loop, but not around all of the hook.

The last row can be kind of tricky to get that strand through the hook, not around it.
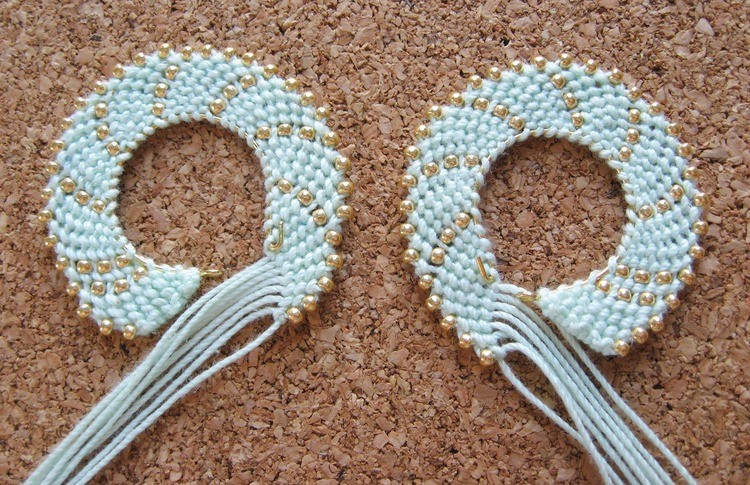
When you get to the end and flip them over they’ll look like this.

Use glue or fray check to seal the edges. I folded back the strands and glued them down so that I would be sure no ends would show on the front. When the glue is dry trim the extra strand length.
Add the hooks and you’re done!