There are so many ways to weave beads together, but flat herringbone stitch beadwork has some unique advantages. The first is that, once established, it goes much more quickly than the same amount of peyote, brick, or square stitch would. Another is that it’s extremely flexible, it drapes almost like fabric. And lastly, it allows you to work flat, in a tube, and with various sizes and styles of beads, as I’ll explain in some upcoming tutorials.


Start out by setting up a nice long doubled strand of bead thread with a stop bead near the end. I’m just doing a sample here, if you’re working on a project you’re going to finish you should put some thought into how much tail to leave for your application. Pick up 4 beads to start.

Go back through those 4 beads in the same direction you did the first time, this will make them into a loop.

Pick up 2 more beads.

Stitch through two from the original loop as shown. You are starting to form a ladder here.

Stitch back through the two beads you just added.

Repeat that – pick up two, stitch through the last two, and then through the new 2 again.

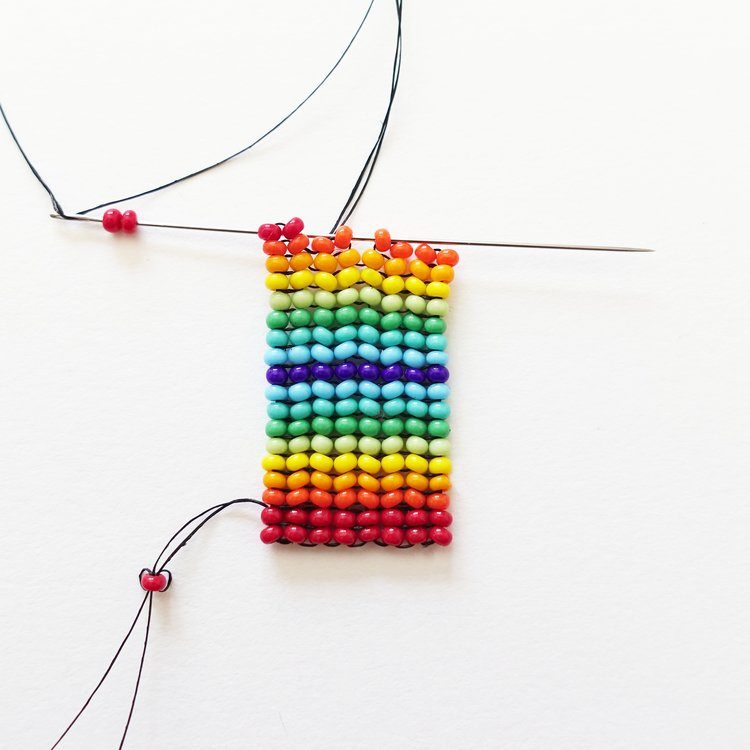
You’ll need a base row with an even number of pairs. Herringbone stitch naturally occurs over an even number of beads.

To start the next row, pick up two beads. I’ve changed color for clarity.

Stitch down through the second bead on the top edge of your starting row.

Then up through the third bead on the starting row.

Add two more beads, and stitch down through the fourth bead in that starting row.

Then up through the fifth. Carry on this way until you’ve added a pair of beads to each pair on the base row.

At the end of the row, go through both beads in the base row.

Then up through the second bead on the base row.

Than zag over, and go up through the first bead in the top of the base row, and the last bead you added in the second (orange) row. That’s how you turn around to start the next row. (Technically, there’s another way to do it, but it leaves a lot of thread showing and a loose edge, so I choose to stitch back through beads in previous rows to avoid that.)

To start the third row, pick up two beads. I’ve switched to yellow beads. Stitch down through the second bead on the previous row.

Then up through the third bead on the previous row.

Add two more beads, and down through the 4th bead.

Keep adding pairs the same way until you reach the end of the row, where you’ll go down through two beads instead of just one.

Over one, and up…

Then back to the edge and up through the two on the edge.
You’re now ready to start on the next row. Just keep going on in this pattern until you reach your desired length.
Once you’re a couple rows in, you can save time by going through the ‘down’ and ‘up’ bead at the same time, as shown. This beading technique is naturally loose enough to allow this, but if yours isn’t you might want to consider relaxing you tension a little bit.
To finish the work, you can loop through stacked pairs of beads to emulate the starting row, which will give you a firm edge for adding a clasp or something similar. Otherwise, you can leave the edge without firming it, potentially adding fringe or loops of beads, or whatever else is appropriate for your project.
It’s worthwhile to make a practice piece before starting on something real, but once you have a feel for the method you can work a lot of beads very quickly, and with a lot of flexibility using the herringbone beadwork stitch!