Sometimes I come up with an idea and find the materials needed to complete the project. Other times I find something I love (like a remnant piece of awesome splatter paint print fabric) and then come up with the best use for the material.

I basically made this bag without a pattern. I worked to use the materials in the most efficient ways possible which accounts for my vague dimensions and approximations. It is a great project for a random scrap of fabric or a lovely fat quarter.
Supplies:
Parts from your Leatherworking Kit:
Leather needles
Thread for sewing fur/leather
Straight edge blade (I used a rotary cutter)
Cork panel
Awl
Leather Punch
Sewing Tools:
Iron
Sewing Machine
Scissors
Pins
Rulers
Materials:
Leather (small scrap or a piece about 6″/15cm square)
3/8 to 1/2 yard/meter fabric or a fat quarter
Iron-On interfacing
Duck cloth/Canvas for lining
Zipper (about 10″/25cm)
Optional: Pre-cut leather lacing
I purchased a remnant piece of fabric that was about 1/2 of a yard. The piece of fabric was 45″ (113cm) wide selvage to selvage and 17″ (43cm) tall.
The first thing I did was remove the selvage edges (they are woven more tightly and have color variations that I did not want getting involved with the bag construction). I was left with a piece of fabric about 43 3/4″ (111cm) wide. I folded the fabric in half and cut it which left me with 2 piece of fabric that were 21 7/8″ (55.5cm) wide by 17″ tall. Save one piece for another project!
Working with the piece of fabric that you are turning into this bag, cut a piece of fabric 2″ (5cm) wide by the length of the long side of your fabric square (in my case, the piece was 2″ x 21 7/8″). This left me with a fabric panel that was 21 7/8″ wide by 15″ tall. Later on we will turn this piece into the bag handle.

Also, cut 3 very skinny pieces of leather from the longest side of your piece of leather.
**Note** If working with a square of leather, wait until later when you cut the pieces for the corners and trim from the longest side of the triangles.
I was working with a scrap of leather from a previous project. The first things I did was make sure I had a nice square 90˚ corner.

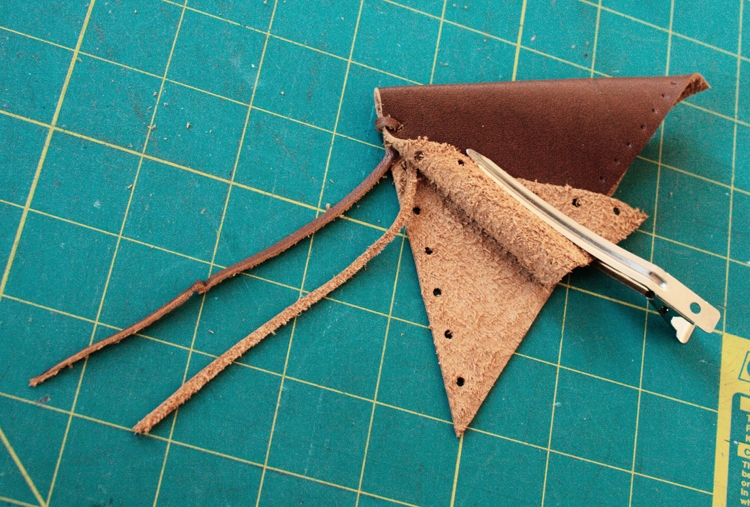
I cut the piece of leather in 2 at a 45˚ angle from my squared corner.

I then trimmed the rough edges to make 2 pieces that are the same size and shape. If you are working with a square piece of leather, simply cut it in half one corner to the opposite corner (then trim a few pieces from the long edge of the triangles to use for lacing).

The longest sides of the triangles will be on the sides of the bag, the leather triangles will fold around the bottom edge of the bag.

Using an awl, pre-punch the holes for lacing. The lacing will go up the sides of the bag so fold the triangle how it will be when completed to ensure your holes line up nicely. Using a ruler to make your spacing even, push holes through both layers of leather (placing the leather on cork panels and pressing the awl through the laters and into the cork works really well!). My lacing holes are 1/2″ (1.25cm) apart.

Using a leather punch, create holes large enough for your strips of lacing to fit through. Punch holes over the spots you marked with the awl.

Create a row of stitching marks for attaching the leather to your bag. Use an awl and ruler to mark evenly spaced stitching points (mine are 1/4″/.6cm apart) along the 2 remaining edges of your leather triangle.

Use some of the leather lacing you cut (or purchased pre-made lacing) to join the edges of your corner.
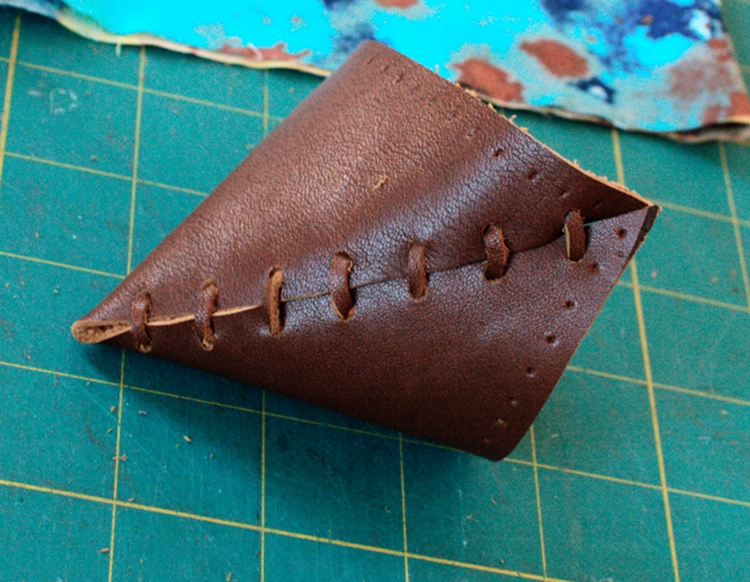
Tie a knot on the inside to secure the ends to the inside.

Cut a piece of iron-on interfacing to match your fabric. Apply the interfacing being careful to make sure the interfacing catches and properly fuses across the whole piece.

Sew the bottom of the bag closed and sew half the side seam. Leave the top half of the side unsewn for now. You can chose your desired seam allowance but should be at least 3/8″ (1 cm) from the cut edges.

Now that your corners are laced up and the bottom of the bag is sewn, you can apply the leather corners to the bag.

Position the first corner and use a few straight pins to hold it in place. Put the pins through your pre-marked sewing holes. The ends of the pins should be somewhere in the fabric of the bag. You don’t want to pin through leather and add additional holes that will disrupt the texture and structure of the leather.

Using a leather needle and leather/fur thread, attach the leather corner to your bag. Sew a running stitch all the way around and fill in the “missing” stitches with a second time around.


Place the second corner and sew it in place, also.

Way back at the beginning, I told you to cut a 2″ (5cm) wide piece of fabric to make into a bag strap. Cut a piece of interfacing to match the width and length of that piece. Also, cut a piece of contrast fabric (I used the same fabric as my lining) that is slightly narrower than the bag fabric (13/4″ wide/4.5cm) and the same length.

Apply the iron-on interfacing to the bag fabric. Fold the edges on the long sides of each piece to the wrong side 1/2″ (1.25cm) and press. For the canvas lining that was cut narrower, fold and press the edges so the strip is a little narrower than the bag fabric.

Align the layers and sew a line of stitching along each folded edge to hold everything in place.

In preparation for finishing the bag, press the top edge to create a roll hem. Fold and press the top edge toward the back 1/4″ (0.6cm) and then folded again 3/4″ (2cm) and press.
Place the bag strap to be sewn into the side seam of the bag. It should be about 3/4″ (2cm) below what will be the top edge of the bag.

Sew the side seam (right sides together). Turn the bag right sides out and press.

A closer look at the preparation for a roll hem.

Cut a lining for your bag from duck cloth/canvas fabric. The lining should be smaller than the outside of the bag so it fits inside without puckering the outside of the bag. For this project, I suggest making the lining 1/4″ (0.6cm) smaller. So if the bag is 10 1/2″ (26.6cm) wide, make the lining 10 1/4″ (26cm) wide.
Part of the reason for using canvas duck cloth to a lining is to add some structure and strength to the bag. You should cut the bag lining so that it is the height of the bag less a small amount for folding ease (1/4″/0.6cm) and less the amount you rolled at the top for your hem.


Place the lining inside the bag. Pin it in place. The roll hem should fold over the lining so that no cut edges show.

Sew the lining to the bag at the hem.


Sew the zipper in place near the top edge of the bag. Use a hand back-stitch to sew it in place. Be careful to not catch the outer-most layer of fabric while you sew so the stitches don’t show on the outside of the bag.

The last remaining piece of leather lacing is a detail on the zipper pull. Simply string the leather through the hole in the end of the zipper pull and tie an overhand knot.


