Most wire weaving that I’ve seen is made only from wire. I love the combination of hard and soft elements, so I made this wire woven bracelet with a wire base and cotton wrapping. It isn’t a very difficult project, but you’ll have an easier time if you can to the first row or two without setting it down. It’s very easy to un-wrap if you’re halfway through and see a mistake, too. I’m really into it and can’t way to make more!


I’m using perle cotton, but you could use a lot of other kinds of thread as well. Try to use something the same as or thinner than your wire for starting out, that makes it easier to manage your tension.

Cut 7 pieces of wire that are just a bit longer than you’d like your finished bracelet to be. Keep in mind that the bracelet will be rigid so it shouldn’t wrap all the way around your wrist – I left a 1 inch | 2.5cm gap in mine.
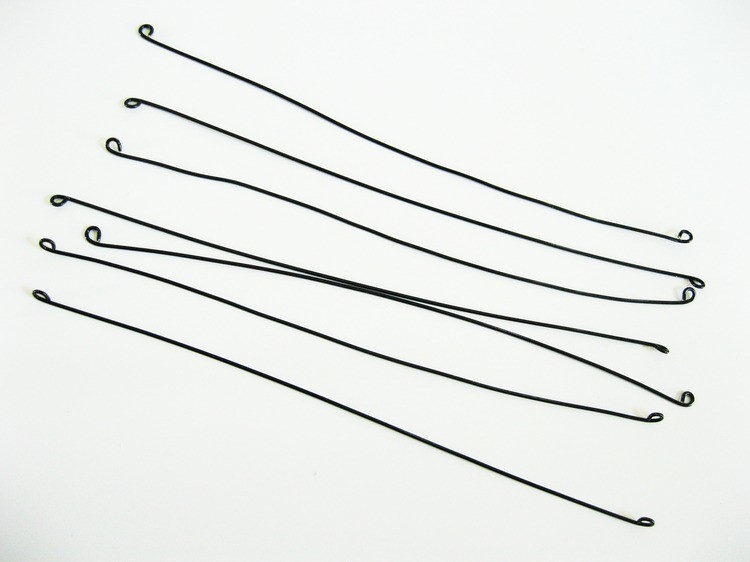
Use the round nose pliers to make a loop at each end of the wire. The loops should be on the same side when the wire is laid flat (look at the top wire in this picture.) To make consistent loops wrap the wire around your pliers the same distance from the tip each time.

Leave the perle cotton attached to the spool. Tie a square knot around two pieces of wire leaving a 2-3 inch | 5 to 7.5 cm tail.
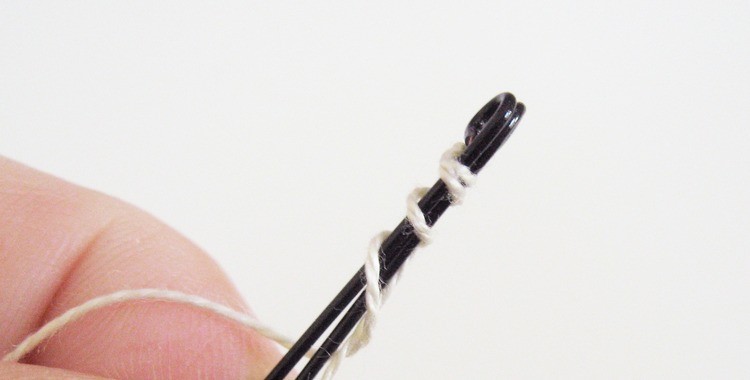
Arrange the wires so that they are facing the same way and the knot is on the wire loop side (from here on referred to as the back.) Hold the tail of the perle cotton with the wires, and wrap the other end around the wires 3 times. Adjust the wraps so they are tight enough to stay in place, but you don’t need them tighter than that.

Add another wire and wrap the cotton around all 3 wires 3 times. Keep holding that tail with it.

Add another wire, but this time only wrap around the 3 wires on the right. You’ll have to slide the cotton between the two wires on the left to do this.

Like always, wrap the cotton 3 times (total).

Continue adding a wire and wrapping 3 times until you run out of wire pieces. Keep them all aligned at the end with the loops facing the same way.

Wrap 3 times around the last 2 wires.

Wrap 3 times around the last 3 wires again. This is the last time you have to worry about the tail – you can just leave it now.

Work back, wrapping 3 times around each group of 3 wires as you go.

When you get to the left side wrap 3 times around the left 2 wires. Wrap back and forth like this until you run out of wire.

If you’re lucky the way I was you’ll end at one edge, but it’s okay if you don’t. Tie the cotton around the current wires (I used a double half hitch knot.) Cut it with a few inches of tail, and if you can, use the needle to slide the tail through the wrapping on the back. It’s hard to do, so it’s okay if you can’t.

Apply some fray check or fabric glue to the starting and ending knots. Leave the tails for now.

I made triangular rings for ends. I placed wire through the loops at one end.

Then used the round nose pliers to bend it around like this.

I made two rings that looked like this. One side of the triangle is 2 thicknesses of wire – those two thicknesses will go into the loops at the end of the bracelet.

Unlike normal jump rings, these you just have to open up like Pacman, add a clasp on one side and a length of chain to the other, and close with both ends of the ring through the loops.

Wrap it around something cylindrical (like this jar of rubber cement) to start shaping it, then adjust it to fit nicely around your wrist.
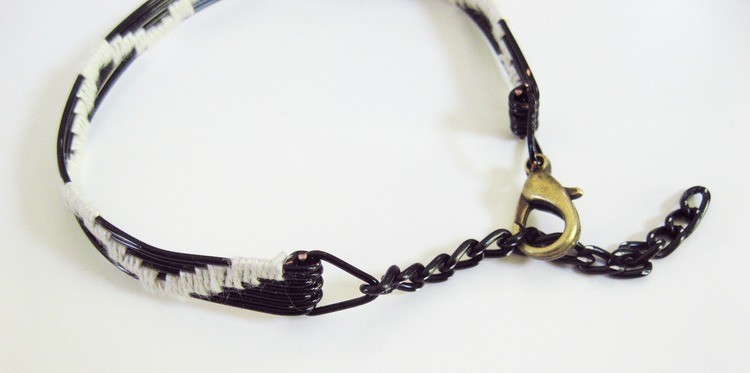
The chain and clasp are there for security, but I could have skipped them. The bracelet stays in place for me without them, so it’s up to you if you want a clasp. When you’re done working on it you can trim the tails and start wearing it!