It is common to start macrame projects by tying a lot of strands to one other strand with lark’s head knots. This is a sturdy and practical way to start, but it could have a little more detail, especially if your starting edge will be prominent in your design. This tutorial covers how to start your project with a picot edge.

You can apply this project to whatever knotting you’re doing, but you’ll need an even number of strands (or a multiple of the number of rows per picot) to make it work. This method requires pinning, so you’ll have to work on something pinnable like cork panels.

Pin down a horizontal strand to knot over. I pin at one side and leave the other loose, but this preference. Start with a lark’s head knot, but with the tails pointing up instead of down. Tighten it evenly by matching the ends of the tails and pulling them together.
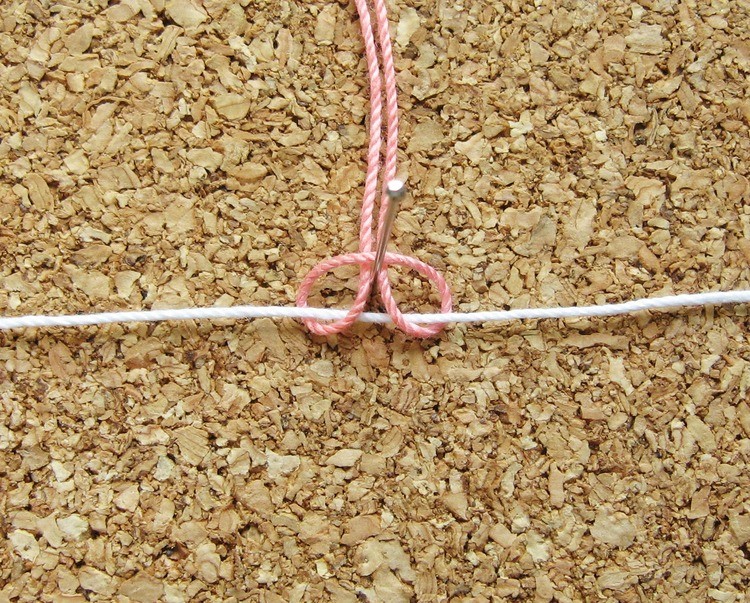
Add a pin just above the horizontal strand and tighten the knot around it.

Pull one strand back under the horizontal, and tie a half hitch knot with it. This forms a double half hitch knot on the right side of the start point. Don’t pull the strand down all the way straight before adding the second half hitch – it’s really easy to loosen up that lark’s head knot when you do this. It might take a little practice to be able to tighten the half hitch without loosening the lark’s head.


Then do the same on the other side – working strand under the horizontal, then a half hitch.

It should look like this when it’s finished.

Add a second pin just behind the first. This will hold the second loop.
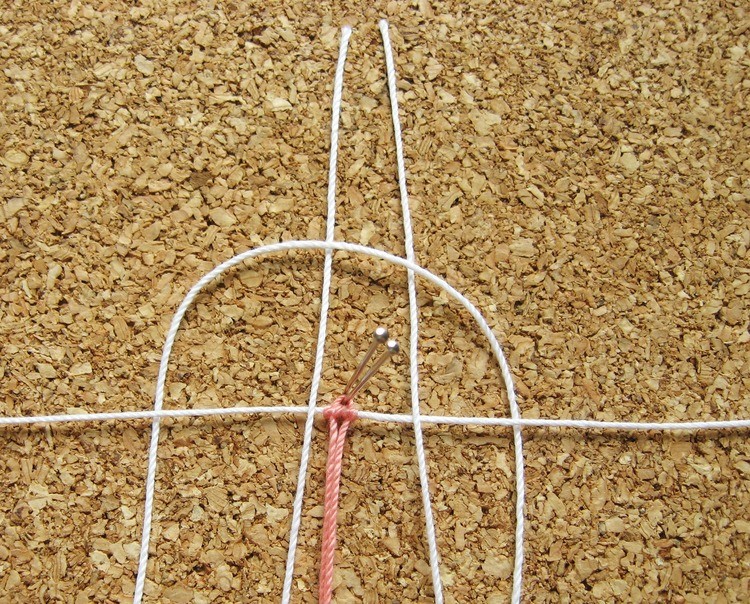
This strand is worked identically to the first, except that it’s worked around the first knot. Tie a lark’s head knot the same way.

It won’t tighten as well, but that’s okay.

Bring the strand under the horizontal and tie a half hitch.

It may help to keep one finger on the other strand near the pin while you tighten this side.

Repeat on the other side.


Repeat all of this for every strand you want to use. Add another pin behind the others to tie around.

Lark’s head and then half hitches.

In theory you can add as many strands as your inner tiny rainbow fan wants, but in practice you’ll need to consider the kind of string you’re working with and how the project will be used. Drapey cotton won’t hold up a lot of little loops, but it could be beautiful if the start of your project will actually be the bottom when it’s finished.

It’s easiest to work each group of strands out some distance on the horizontal strand, then slide it together with the rest when all of your knots are tied.
