This is the process for attaching an upper to the insole made in Part 4.
This series includes:
Part 1 – Intro & Supplies
Part 2 – Making a Pattern
Part 3 – Making a Test Shoe
Part 4 – Making an Insole
Part 5 – Gluing an Upper to an Insole
Part 6 – Making a Shoe Sole
Part 7 – Making a Minimalist Style Upper
If your upper is made from a fabric prone to fraying run a line of Fray Check around the edge and allow to dry before you begin.
Double check that you’ve matched a right upper with a right insole (or vice versa.)
Start with gluing down the toe area of the shoe. Glue the upper to the insole at one point at the side of the toe. Use care to match the edge of the upper to the 1/2 inch line on the sole. Allow to dry well, you’ll be using this point as an anchor point.
Thread a needle, double the thread and tie the ends together.
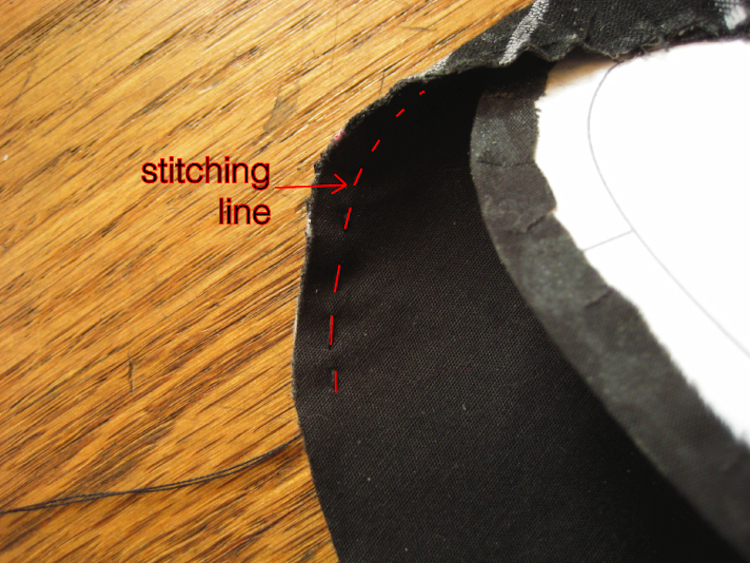
Start a running stitch near the glued point, stitch to the next matching mark.
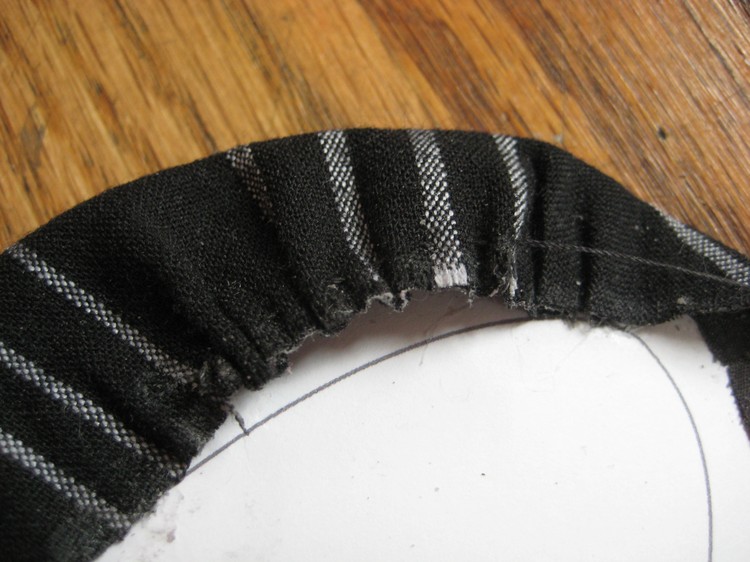
Pull the stitches into a gather until it fits the gluing area.
Apply glue to the area you’ve prepared.

Press the fabric into place, making sure to align the gluing mark and the fabric along the 1/2 inch line. You may wish to clamp this in place until it sets with some small spring or ratcheting clamps.
Continue this process of gathering and gluing until you reach the other side of the heavily curved toe area.
Glue the heel onto the insole at the heel seam point. Allow to dry.
Repeat the gathering procedure on either side of the heel. Glue in place.
Glue down the straight/slightly curved areas.
Allow all glue to dry thoroughly before attaching the rubber outsole. Double check the seal all the way around and re-glue anything that’s loose.
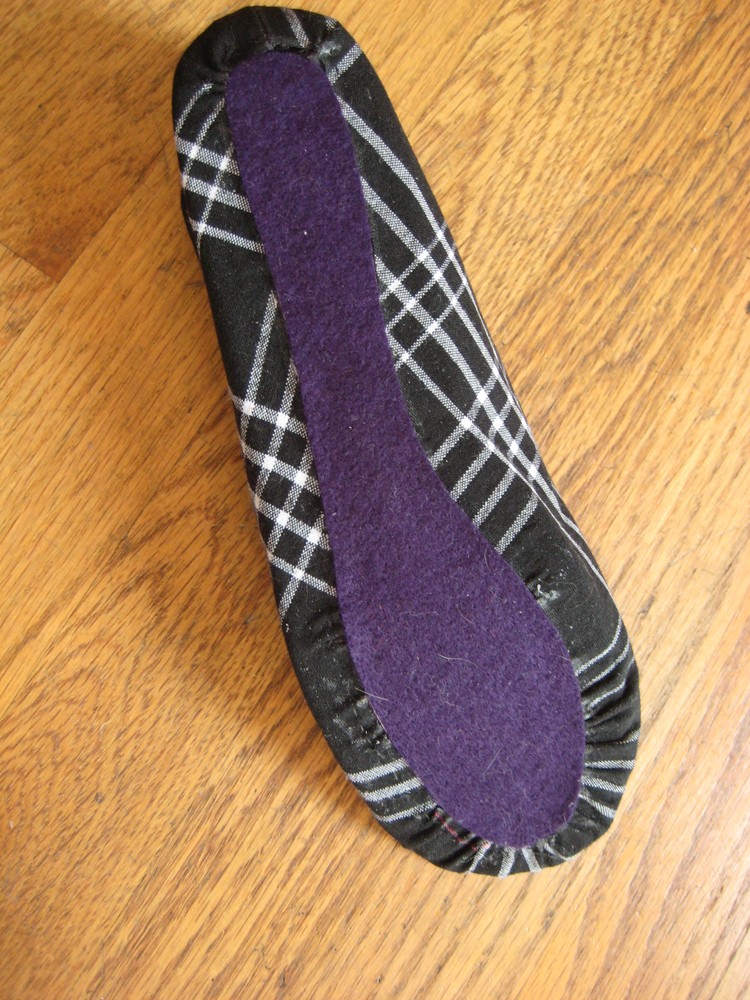
Cut a filler piece for the shoe soles – this should be the insole minus the 1/2 inch margin. Felt is an excellent choice for this. A sandwich of outer, lining and interfacing that matches the upper also works well.
Glue the felt filler into the center area.
Previously:
Part 1 – Intro & Supplies
Part 2 – Making a Pattern
Part 3 – Making a Test Shoe
Part 4 – Making an Insole