Pin looms evoke memories of making pot holders as a kid, but they’re great for doing a lot more than that. Once you know how to weave on a pin loom they’re a fast, pleasant way to make lots of neat squares of flat woven fabric. The combined squares are perfect for making things like large blankets that lay and fold very flat, or for using up odds and ends of yarn since all the squares weave up to the same size.
You can purchase looms like this in a variety of sizes or make your own to suit your project (it’s just nails in a piece or frame of wood.) As long as the loom is square and has the same number of nails on each side you’ll be able to use the same method of weaving. Different yarns and nail spacing will give different effects, and larger looms like this can be woven with wool and felted (as I’m doing) or woven with multiple strands of yarn at once to make denser fabric.

This method is called ‘speed weaving’ because you only actually have to put effort into weaving half of the square – the method automatically weaves the other half. In this case you’re actively weaving the triangle that makes up the upper right hand side, while the lower left triangle fills itself in without much help. That will make more sense as you start to work on it.
I’m using a loom that is about 8 inches square with a nail every 1/2 inch. As I said, buy or make one any size as long as it’s square and has an equal number of nails on all sides. Be sure to use nails with tiny heads if you make your own. You can use a frame as I did, or a solid piece of wood. In addition to the loom you’ll need yarn, a crochet hook and a pair of scissors. The hook size is just whatever grabs your yarn well.


Start by making a slip knot. I like to leave a tail that’s the width of my hand (approximately.)

Wrap the yarn around a couple fingers so that it crosses, as shown.

Slide the crochet hook under the loop.
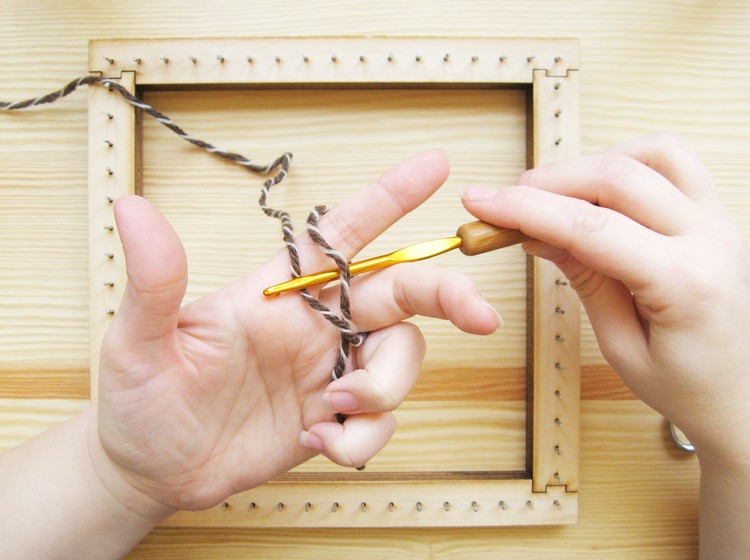
Grab the yarn end that’s still attached to the ball of yarn. Pull it through.


Tighten the knot.

Hook that loop across two corner nails on the diagonal.
For wool and stretchy yarns: I pull the yarn up tight to keep the squares consistent.
For cotton and other non-stretchy yarns: Leave the yarn loose so that it’s not too tight to weave by the end of the square.

Pull the loop around so that it is hooked over a second nail at the lower left corner. Try to keep that slip knot so that it’s touching that nail.

Wrap the yarn around the last available nail at the top right.

Slide your crochet hook over the first strand of yarn and under the second.

Grab the yarn and pull it through. Make sure you’re pulling the right strand so that it looks like the next picture.

Hook it over the upper right hand pin on the right side.

Hook it over the bottom pin that is farthest to the left.

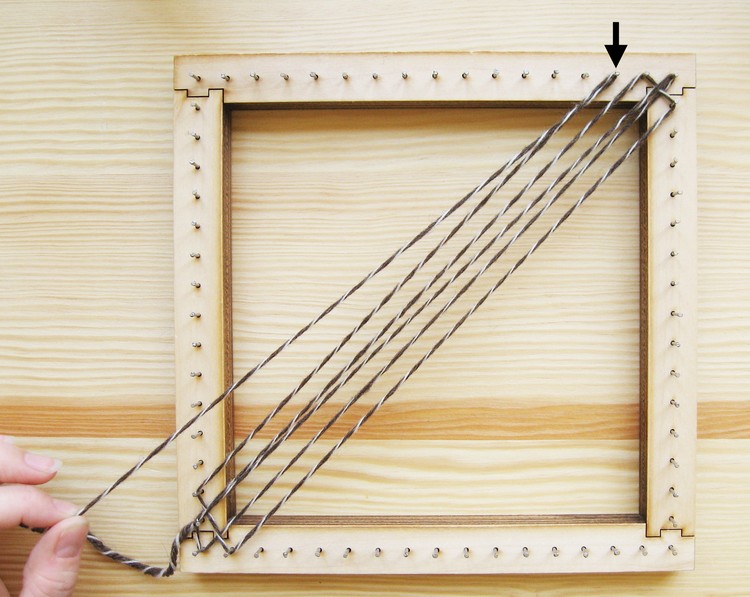
Wrap again on the diagonal, around the top right available pin.

Slide the crochet hook over, under, over and under, then grab the yarn. The crochet hook always starts over from the right.
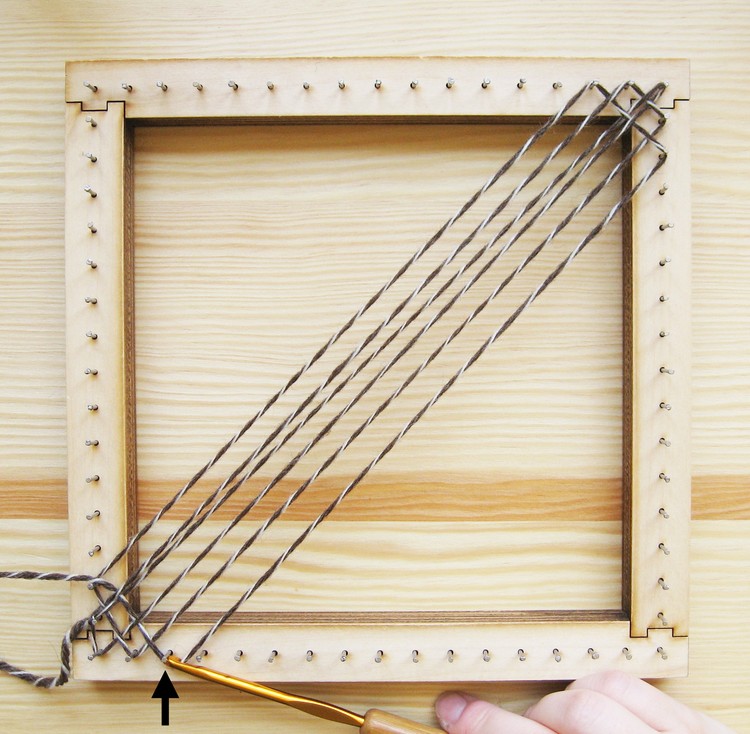
Hook the yarn over the top right side and left bottom pin.


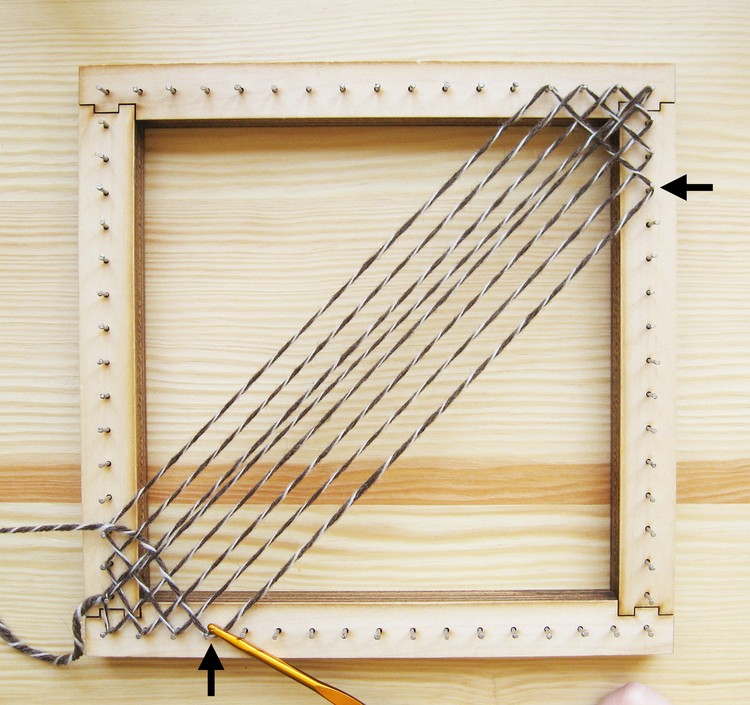
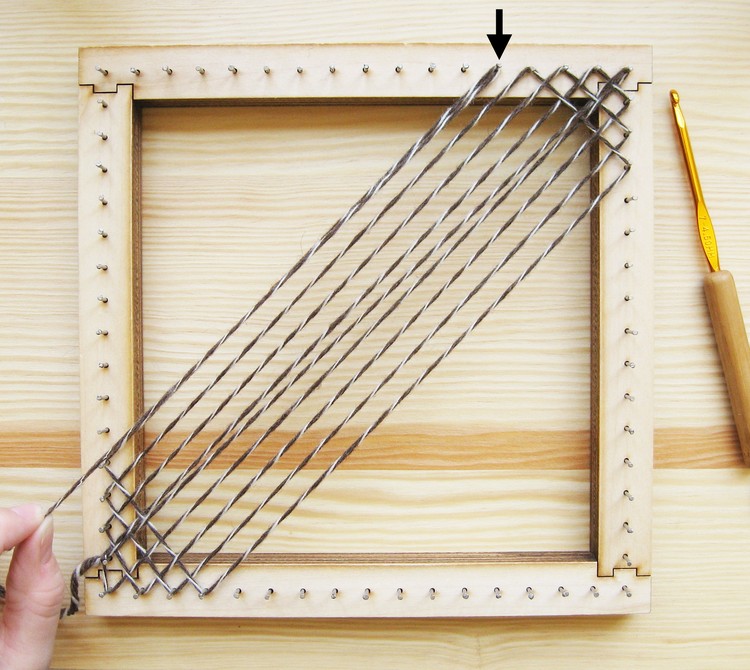


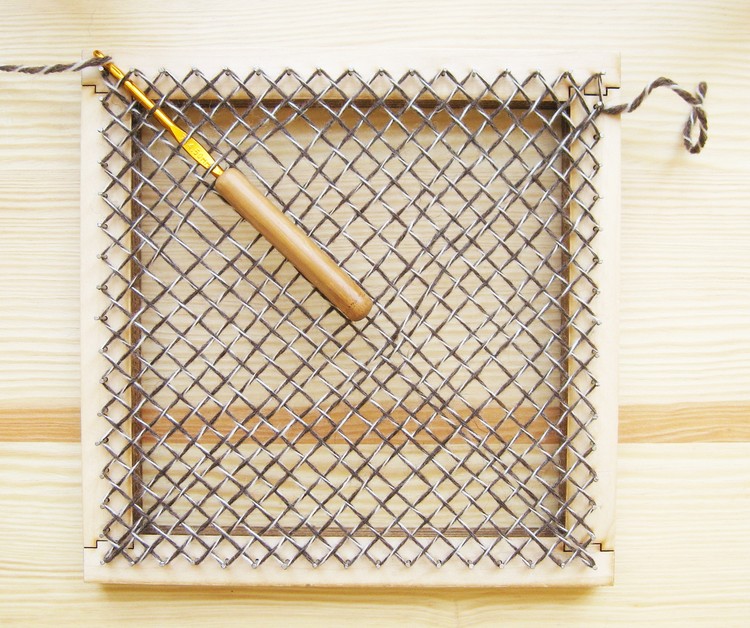
Eventually the square will be too big for the crochet hook. Just do the weaving in sections, making sure the weave stays consistent.

Eventually you’ll run out of pins and it will look like this. Weave one more row through the gap just to the right of the top left pin.

Hook it over the lower right pin.

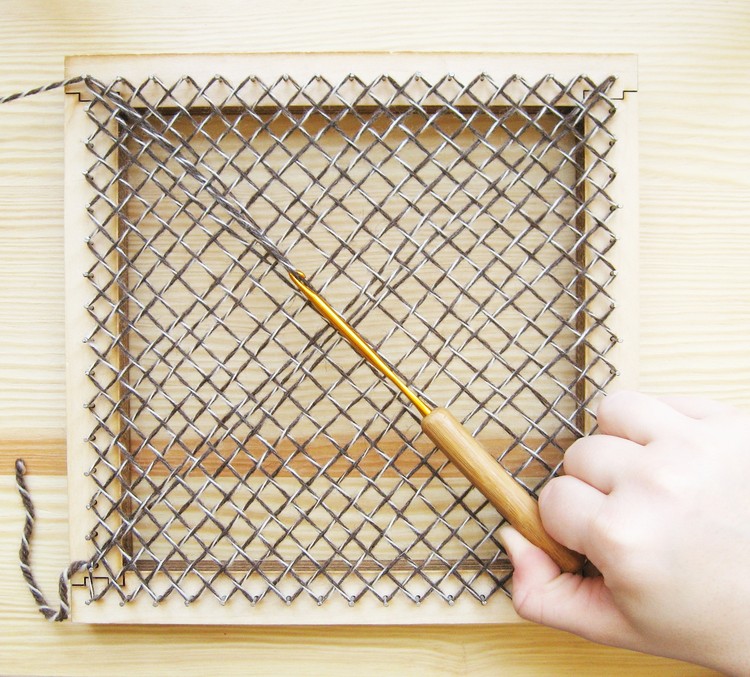
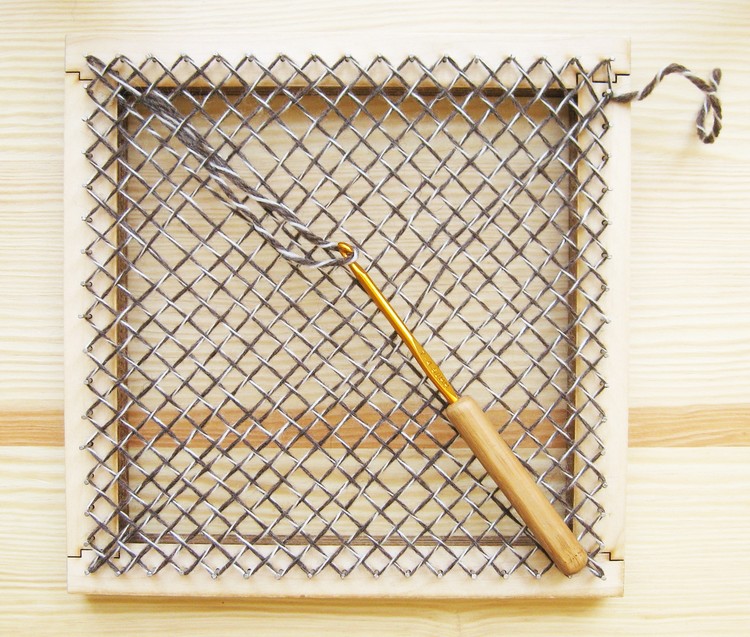
Cut the yarn.

Hook into the last loop you made (just before cutting the yarn.) Pull the tail out.
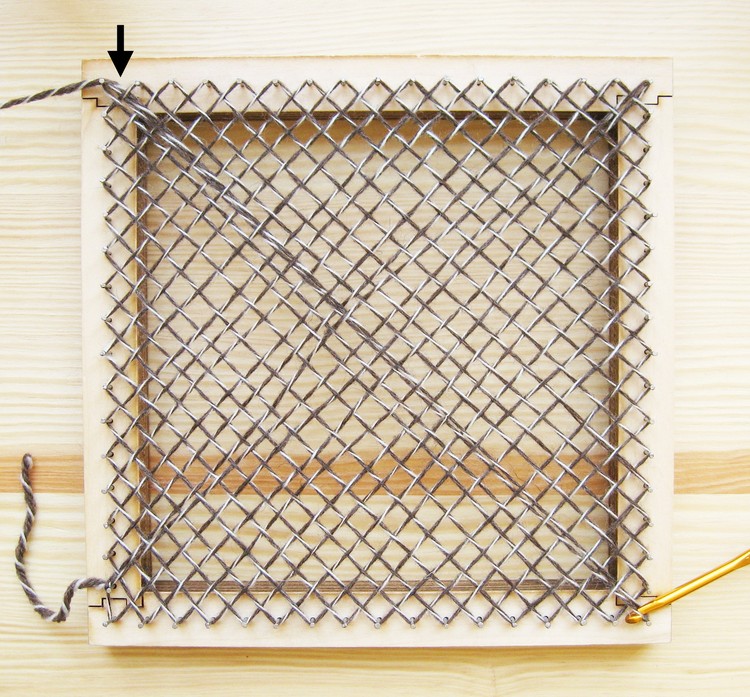
Turn the loom 180 degrees.
Again in the gap just to the right of the top left pin, weave in the tail. Just as before, opposite the on the other side of the top left pin. The crochet hook should go under the last strand by the pin.
Weave the tail in completely.


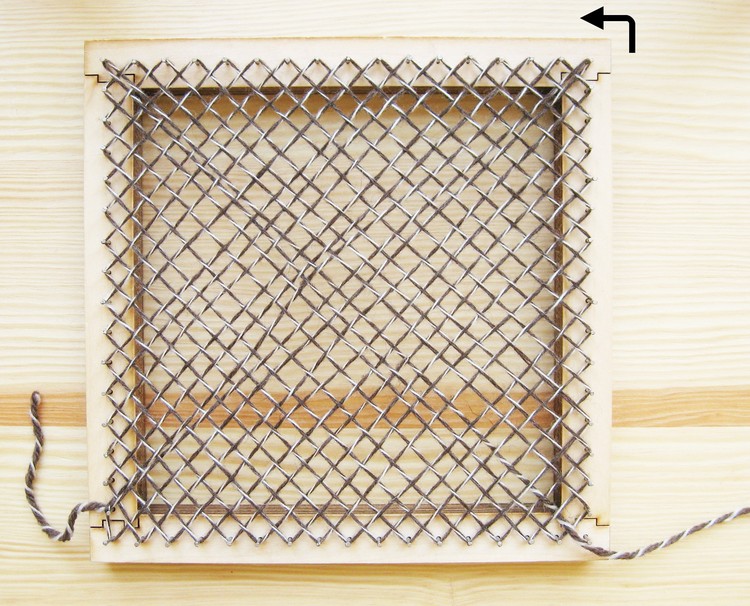
Turn the loom again, this time 90 degree counter clockwise (or 270 degrees clockwise, if you want to do it the hard way.)

Weave that tail in at through the gap with the arrow. Be careful not to pull that knot so that it moves out of place.

And just like that the square is done.

Use the crochet hook to lift off the loops from one side, then pull the rest of it off. If you’ve chosen a lacy weave like I have you’ll need to be a bit careful to not pull it out of shape.

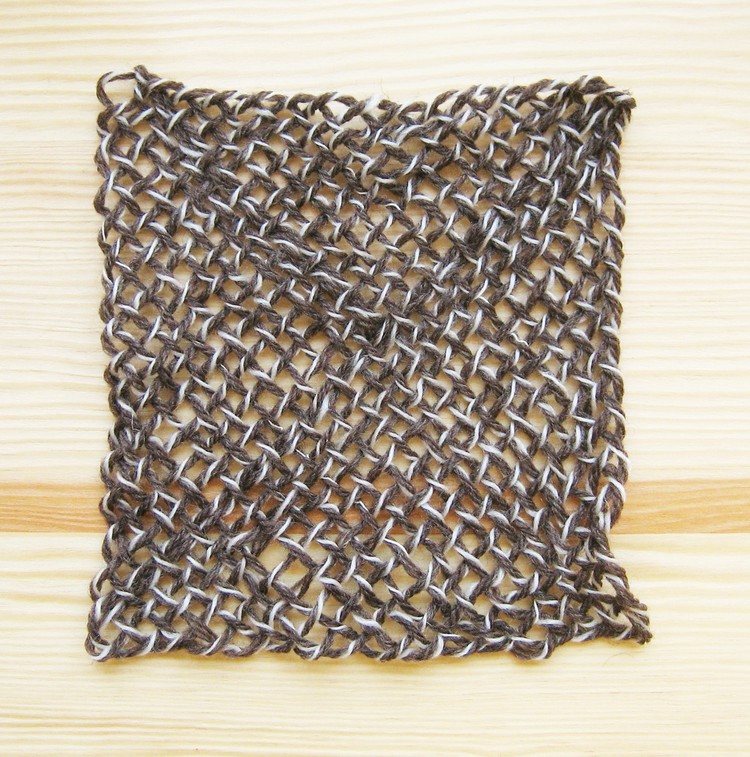
Make a few dozen and then use the square joining tutorial to hook them together! (Click here!)