This is one of those epic art techniques that allows you to add any imagery you want anywhere you want. The finished product is transparent, archival, flexible, and pretty cool looking. It can be used with black and white or full color imagery.

Materials and Equipment:
– clear acrylic medium – I’m using Liquitex Gloss Medium because they’re my favorite, but other brands should work, too. Do a small test before committing to a large project.
– rubber cement
– paint brush
– glass – I’m using a cheap frame so I don’t cut myself on the edges, glass is sharp!
– photocopies*
– water
*Inkjet prints won’t work here – you’ll just end up with a smeary mess. Black and white or color photocopies will work. I copied this out of a book of old etchings but you can use any source you want. (Be careful about copyrights if you’re going to sell what you make!)
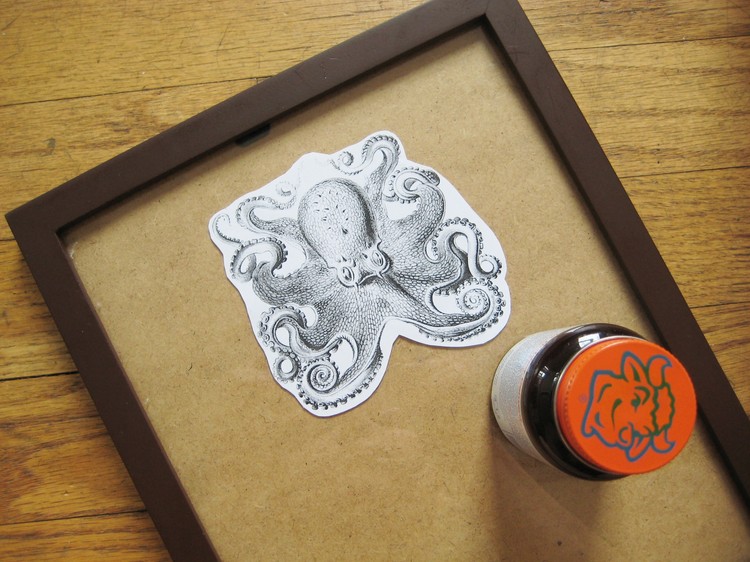
Trim the image out with a bit of margin. Glue it to the glass with a smooth, consistent coat of rubber cement. Be careful not to get rubber cement on the front of the image. Allow this to dry completely before proceeding.
You can also use spray adhesive for this step, but I’ve found it makes it more difficult to remove the paper later.
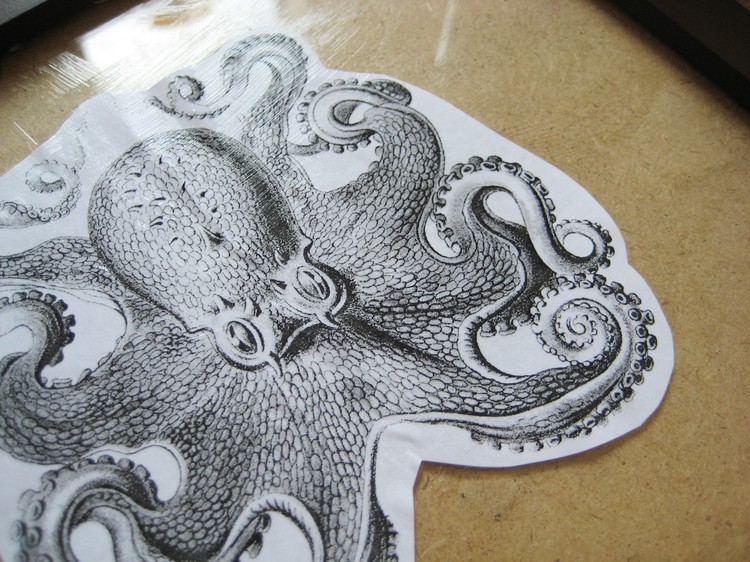
Brush a VERY thin coat of acrylic gloss medium over the image. It’s okay if the image doesn’t end up with perfect coverage and if the acrylic runs off the edge onto the glass. Thin coverage is the key. Acrylic mediums contain water and water makes paper warp. Applying a thin coat minimizes warping and seals the surface of the paper. Allow to dry completely.
It might still warp – this is art, embrace a bit of unpredictability.
Continue applying layers of gloss medium to the image. You can experiment with thick layers, thin layers, brush marks, tinting the medium and any other techniques that might add to your finished project.
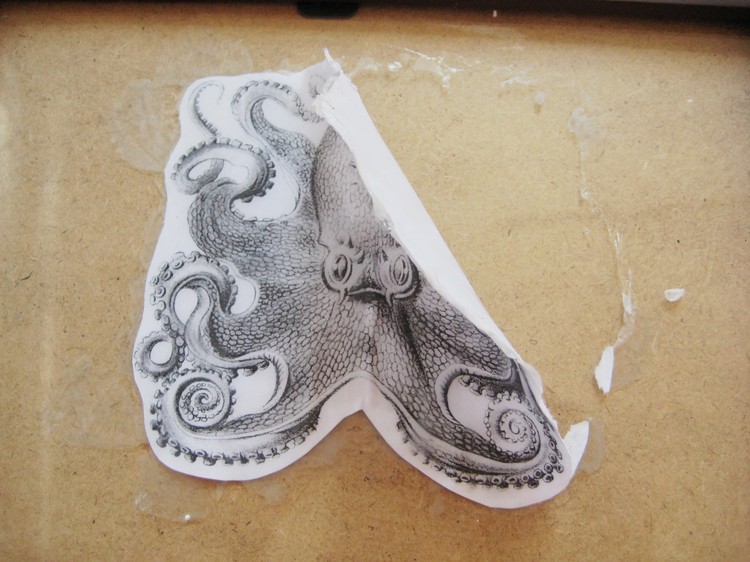
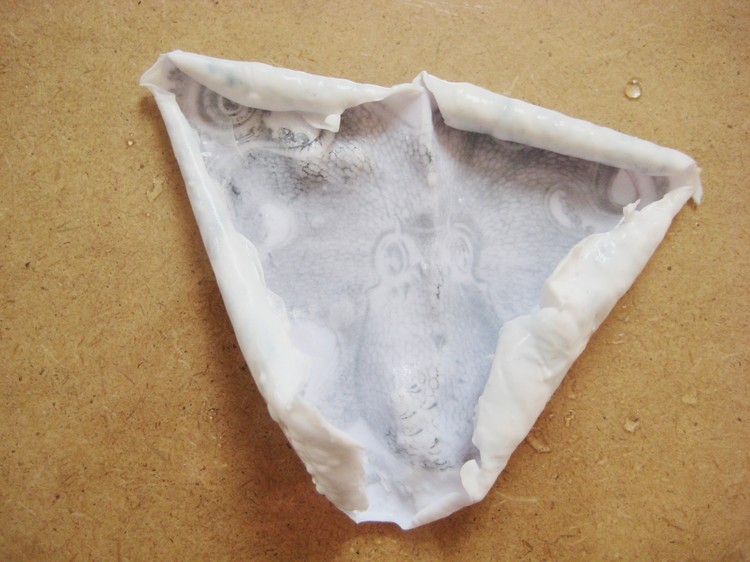
When your layers are fairly thick and completely dry peel the image up from the glass. Slowly ease it off the glass to reduce the risk of tearing.
Flip the transfer over and remove as much of the rubber cement as possible.

Place the transfer in water. You’re doing this to soften the paper. Leave it in for at least several hours, overnight is fine. The acrylic will turn cloudy or opaque, but that’s nothing to worry about.
Place the transfer back on the glass, paper side up.
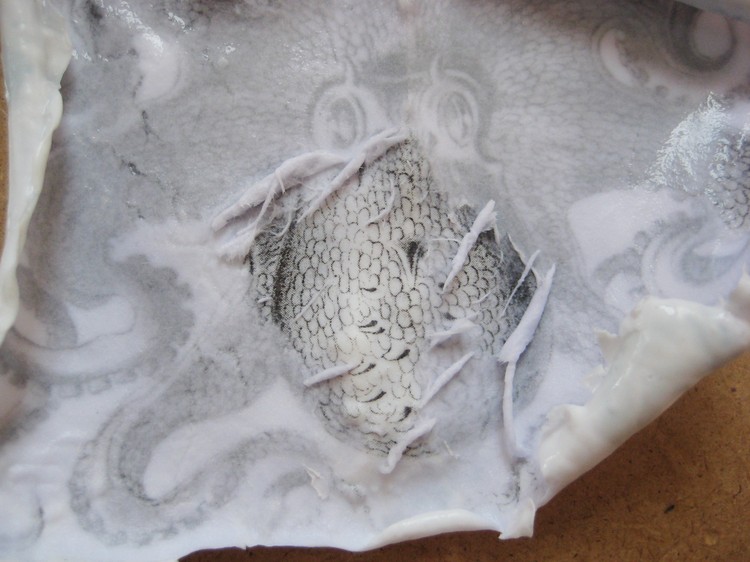
Very gently start rubbing the paper off. It should peel off easily. If it doesn’t, soak it longer.

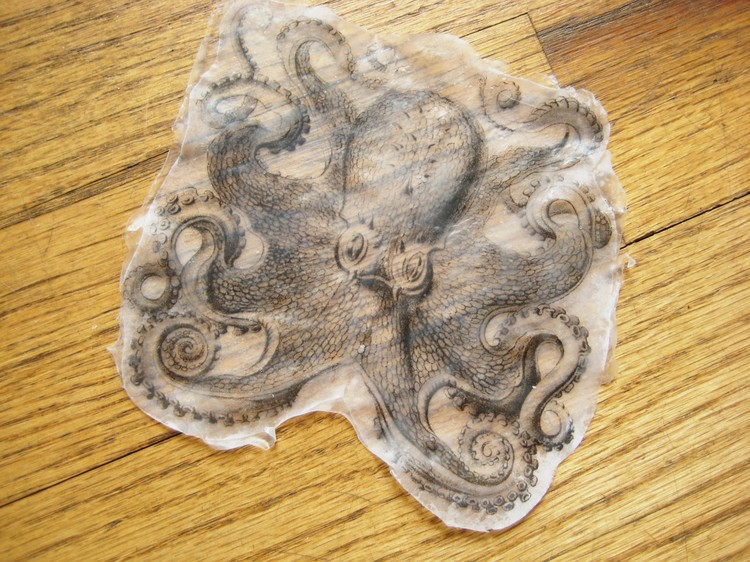
Keep going until all of the paper is removed – you can rinse it to get rid of tiny bits. Leave the image on the glass to dry.

When it’s clear again you’ll probably notice a paper haze. We can fix it. Brush a bit of water over the paper side, the paper will disappear (you can see where I’ve brushed water in the picture.) When the surface is wet brush a small amount of gloss medium over it, this will soak in and keep it clear forever.
I added a coat of matter medium to the front of this for a vintage look, and it made it a bit cloudier than it would have been otherwise.
Your transfer is ready to go – if you’re not using it for a while store it flat between layers of waxed paper for safe keeping. When you’re ready to use it just stick it where you want it with more clear acrylic medium!