This beautiful classic knitting stitch is known as hazelnut stitch in more contemporary sources, but it is more likely to be called cob nut stitch if you’re looking at an older knitting book (or cookbook.) It has a pretty raised texture that’s ideal for cozy sweaters and blankets. It could be worked as a repeat as shown, or the first few rows of the pattern could be used as accent along an edge. This sample is shown knitted in Paton’s Classic Wool.
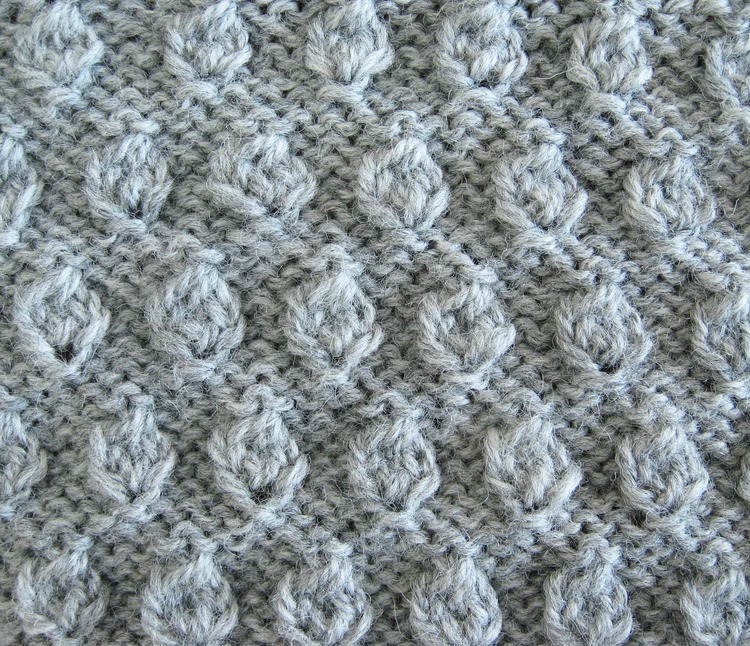
Hazelnut Stitch
Multiple of 4 Stitches
1: *p3 (k1, m1, k1) into next stitch*
2: *p3, k3*
3: *p3, k3*
4: *p3tog, k3*
5: p
6: k
7: p1, *(k1, m1, k1) into next stitch, p3* (k1, m1, k1) into next stitch, p2
8: k2, *p3, k3,* p3, k1
9: p1 *k3, p3,* k3, p2
10: k2, *p3tog, k3,* p3tog, k1
11: p
12: k
Key:
repeat what’s between the * *
k = knit
p = purl
p3tog = purl 3 stitches together
m1 = yarn over needle to make 1 stitch

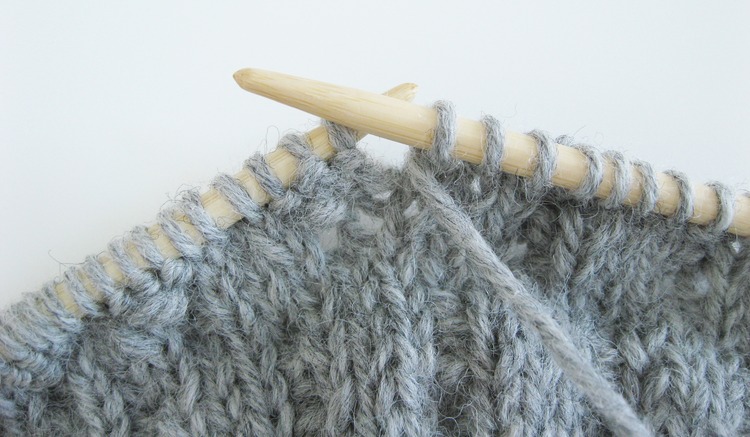
To complete the (k1, m1, k1) into 1 stitch part of the pattern….

Knit the stitch, but don’t pull it off of the left hand needle.

Wrap the yarn around the right needle,

Put the right needle back into the same stitch and knit it again, then pull it from the left needle.

Your row will now be a multiple of 6 stitches, instead of the 4 it was at the start of the pattern.

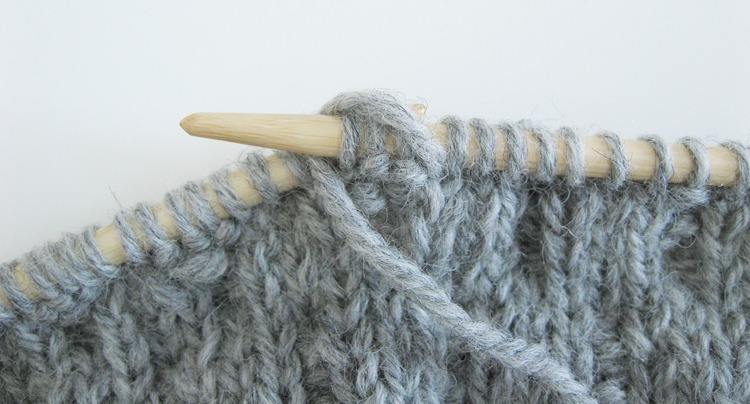
On the next row you’ll purl the 3 stitches that were worked in 1 stitch. In many patterns that use yarn over as an increase the yarn over is meant to be an eyelet. This is not the case here.

Make sure you purl into the back of the yarn over like it was any other stitch. This will ensure that it twists closed and the hazelnut is solid. This really is a picture of how you normally purl.

If you’ve never done a p3tog – purl 3 stitches together – it is very literally exactly what it sounds like.

Slide the needle into 3 stitches the way you normally would with 1 stitch.
Wrap the yarn around like you would if it was 1 stitch.
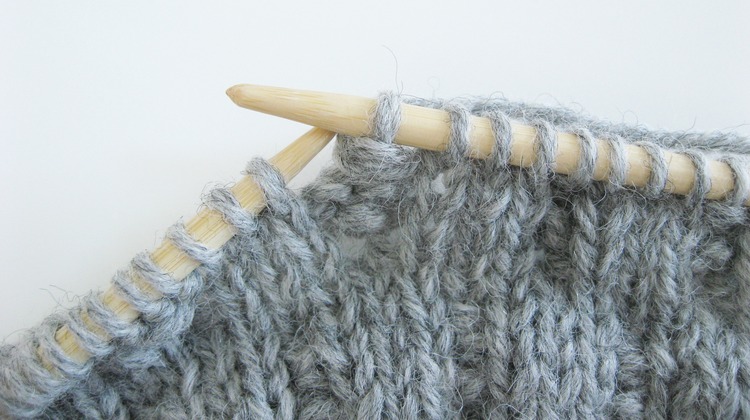
Draw a loop through as if it were 1 stitch. Be careful that you’ve caught them all. This is what causes that “soft serve ice cream” top of the hazelnut.