Like most people, you wear clothes with a range of different necklines – anything from a deep v-neck to a collar – and have probably had moments where the perfect necklace just didn’t want to get along with the neckline of your shirt. Since I believe that a big reason to make your own stuff is to solve these little annoying day to day problems, I worked out a fix. This convertible charm necklace and choker ensures that you can wear a wide, statement style jewelry at any length you want.


Supplies:
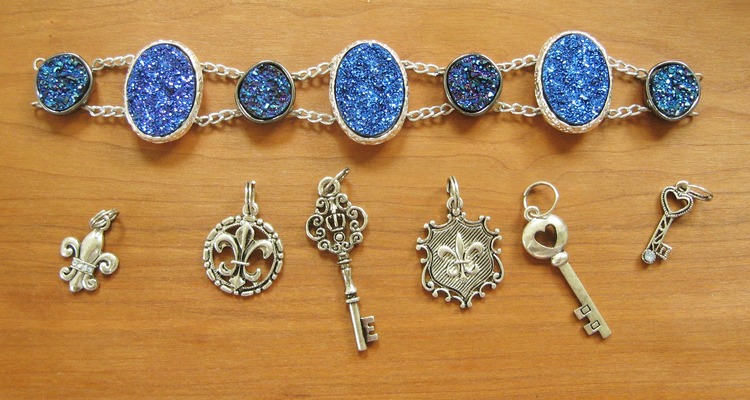
– 2-hole spacer pieces – I found these blue faux druzy pieces at a big box craft store
– an assortment of charms in different sizes – I used some key and crest charms, and the spikes shown
– jewelry chain
– jump rings
– clasp
– needle nose pliers
– round nose pliers
– wire cutters
The exact findings and charms you use will be dependent on availability and your taste, but using 2-hole spacer pieces makes the convertibility work better.

Start out buy adding wire loops to your 2-hole spacers. If you’ve never done this sort of wire work you should check out this handy tutorial on making your loops look good.


When your spacers are ready to link, arrange everything the way you want it to be when the necklace is finished.

Start adding short pieces of chain between the spacers. I was able to open and close the links in my chain, if your chain is soldered you’ll either need to open the rings you made on the spacers or use jump rings to link the chain to the spacers. I used a little measuring and math to figure out that three links were about right for my finished piece to be a nice size for a necklace.

Add chain to one side of all but the last spacer.

Hook the spacers together, keeping everything in order.

Hook the charms into the chain sections with jump rings. Click here if you’ve new to using jump rings!


I added loops of chain between the charms for balance and so that there was a good place to hang my spikes. Each of my loops is 15 chain links long except for the center loop, I added an extra link because I was using an extra spike (other wise I would have had one leftover spike – no thanks!)

Hook the spikes onto the loops with jump rings.

Now measure your pieces so far, then measure your neck (standing up around your throat the way a choker is worn.) You want to cut two equal pieces of chain that, when folded in half, make the necklace length add up to a bit less than the size of your neck – this will let you wear it as a choker. (The last length of chain for spikes needs to attach to this so it’s still hanging there waiting.)

Loop the jump ring around the chain, not through a link.

Do the same on this side – loop a jump ring around that chain, and add another piece of chain that makes the necklace the longest length you expect to wear it.

This is the finished necklace – the trick is that because the clasp and extender can slide the necklace will lay flat when you’re wearing it as a necklace, but the necklace will also stand up as a choker.
To make this necklace the normal way the top chain that wraps around to the back would need to be shorter than the bottom chain…

…but a choker needs those chains to be the same length. Looping the clasp and extender around the chain makes it lay properly no matter which way you want to wear it!
